Set Up Sponsorships With Form Builder
Setting up sponsorships via Content > Page Manager > Form Builder works well for organizations that have fixed terms. This is also a good options for sponsorships that are not sold to back a meeting.
|
Tip: To setup sponsorships that tie in with the meeting registration process, review the how to articles for the basic meeting sponsorship setup and ways to link this setup to Ad Manager > Sponsors & Advertisers. |
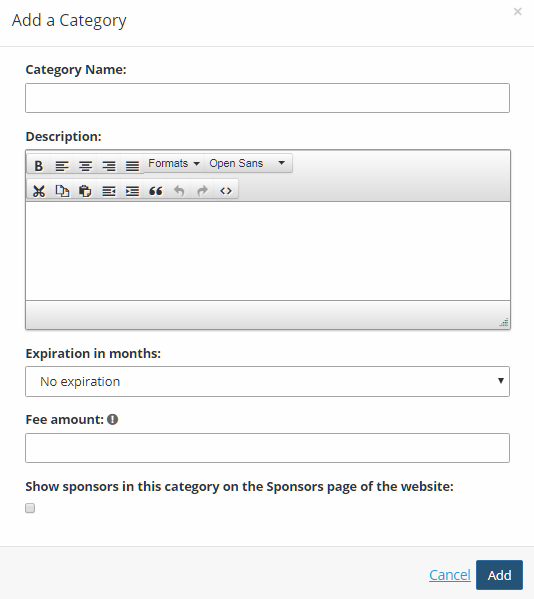
Step 1: Setup The Sponsorship Categories
Go to Content > Ad Manager > Settings > Sponsors.
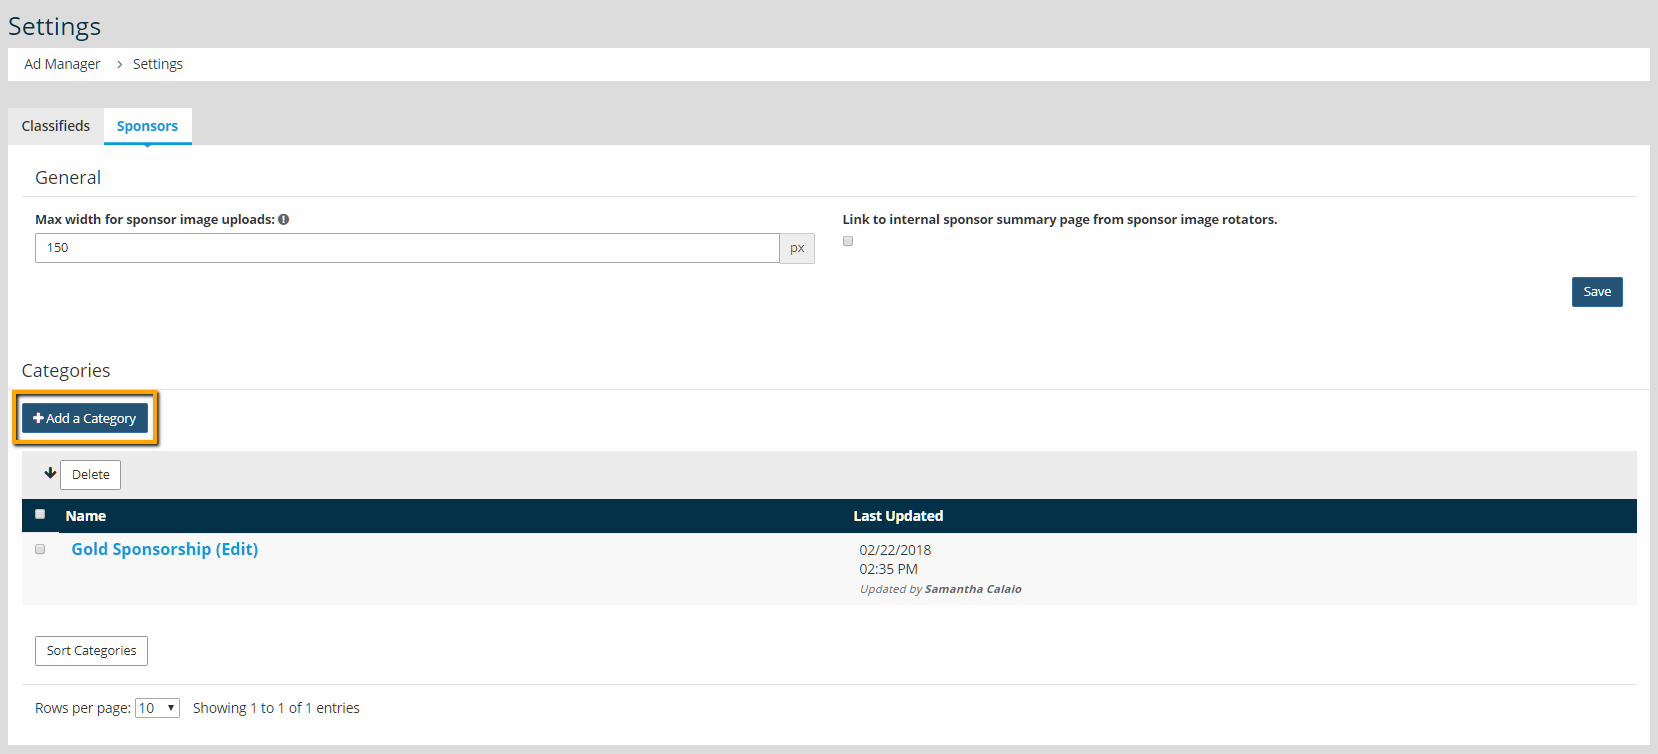
Setup sponsorship categories and include the price of the sponsorship, duration, and whether the information shows on the /sponsors.php page.
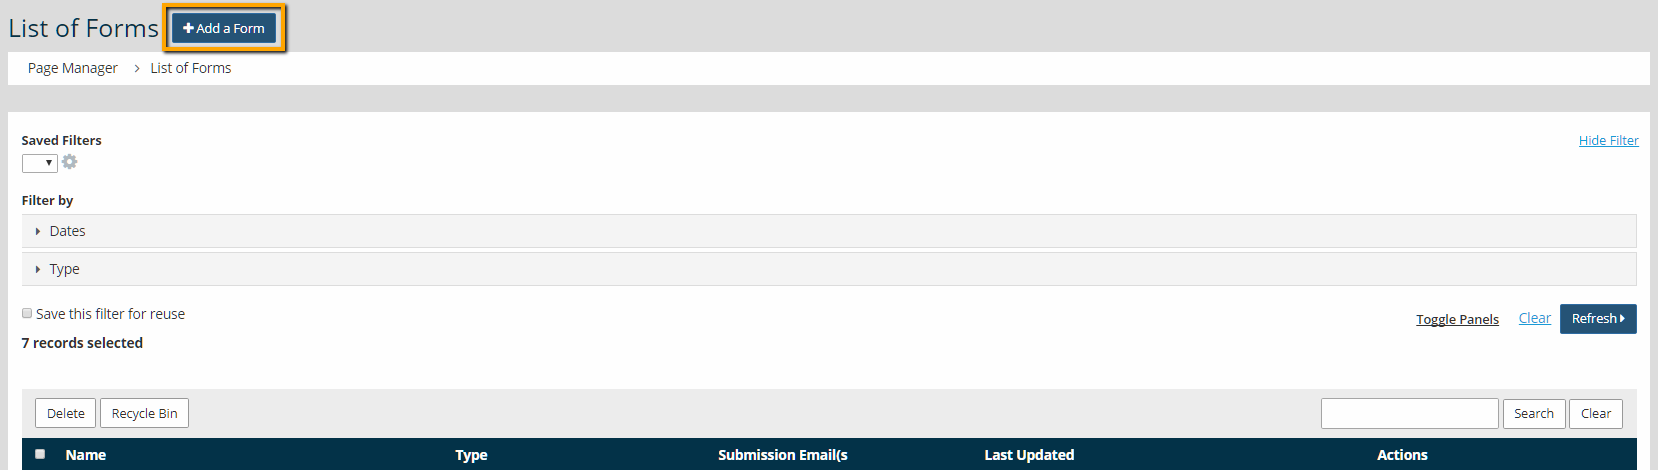
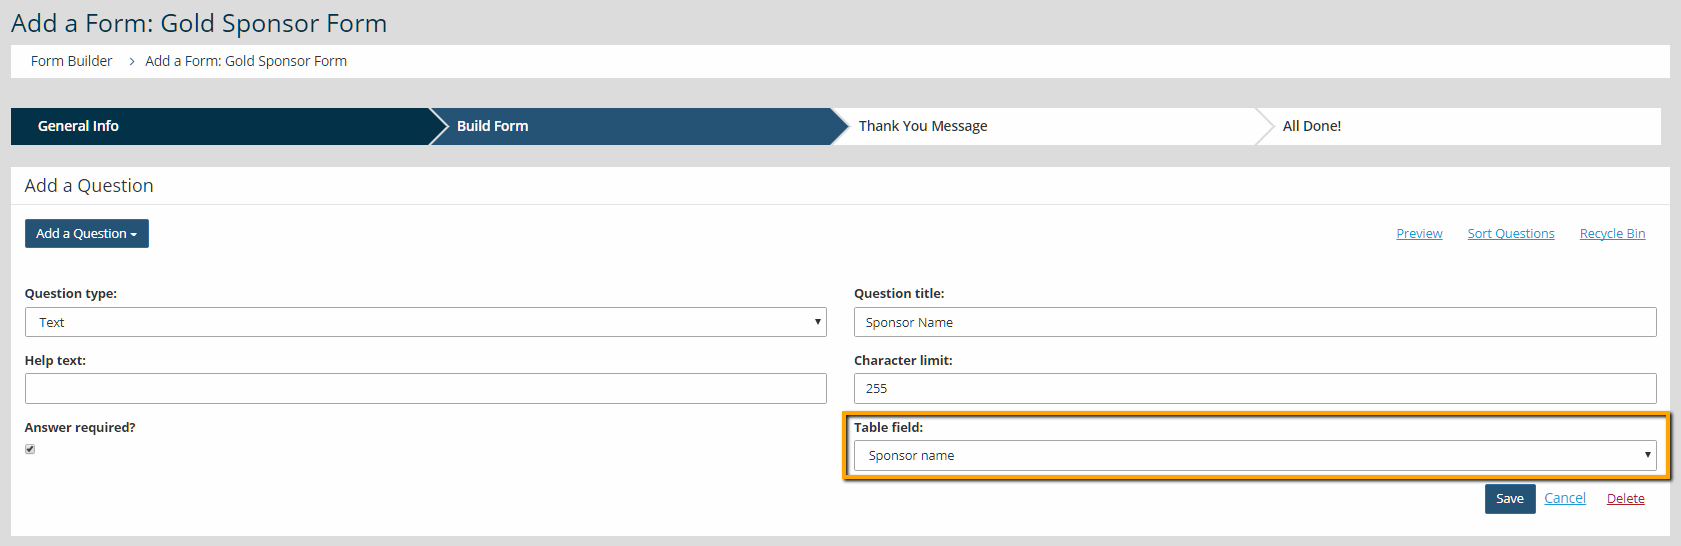
Step 2: Build A Sponsor Form
After the sponsor category is setup, then the next step is to create a sponsor form in Content > Page Manager > Form Builder. Start by adding a new form.
On the next screen, set the Type and Sponsor Category.
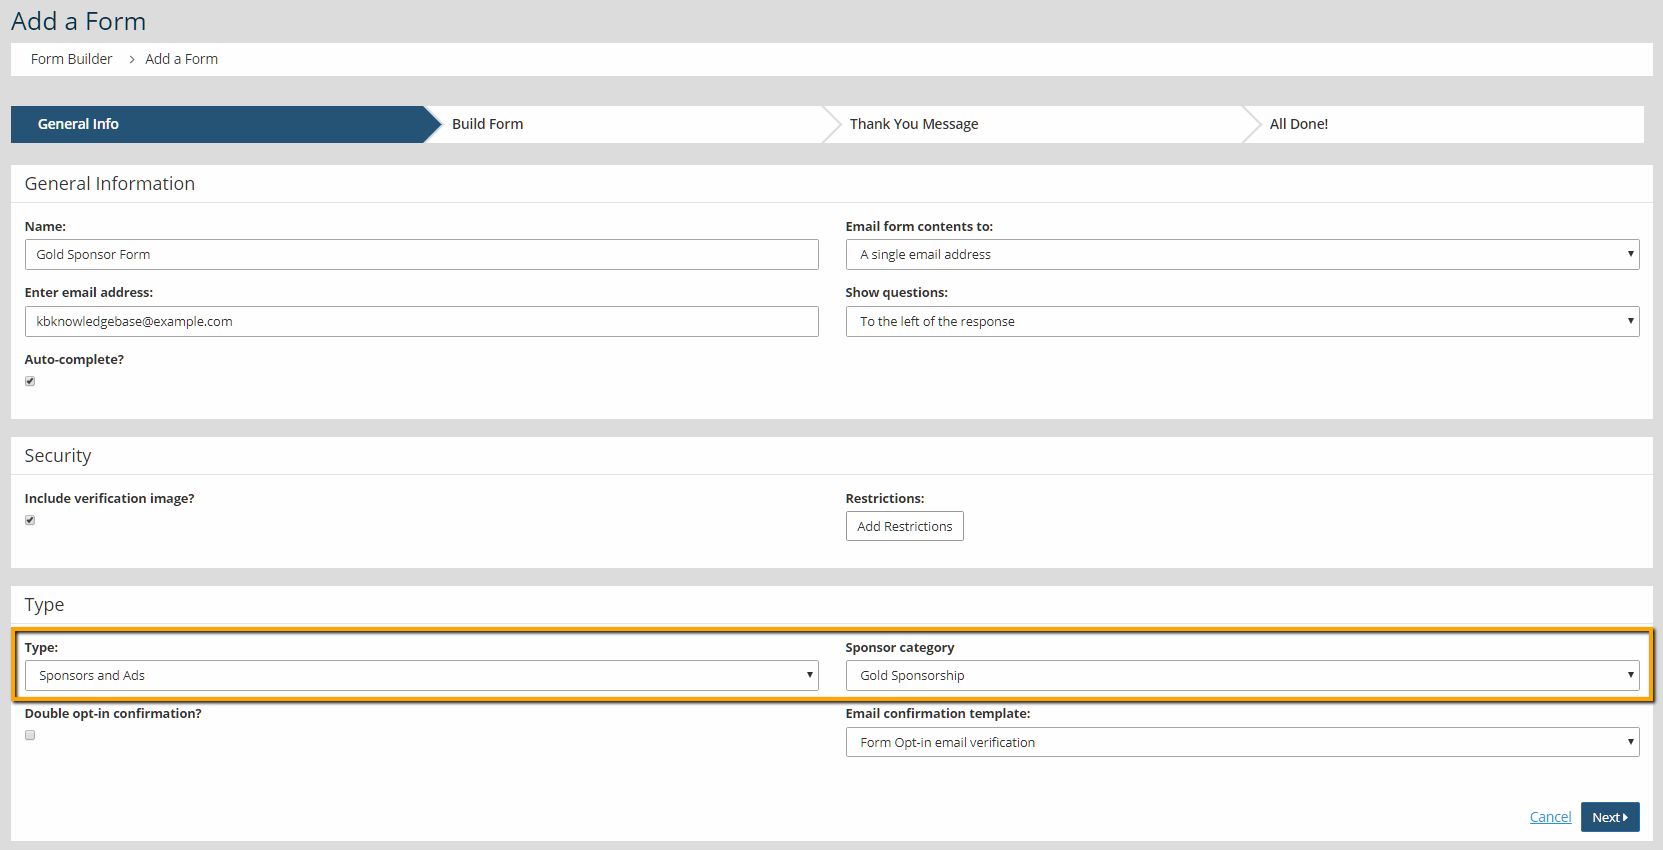
On the 'Build Form' screen, users can add new questions. Use the Table Field to select what field should populate from the form to Content > Ad Manager > Sponsors & Advertisers.
Step 3: Add The Forms To The Website
After creating the form, the next step is to publish the form using Navigation Manager.
The other option is to copy the Sponsor button, below. Paste this into a text editor in the admin area. Highlight the text and use the chain link button to add the form.
|
Tip: The button styles are pulling from the Design Editor located in Design > Design Editor. To update button styles across your site, click the published design to edit. Scroll to the bottom of the Typography section (located in a tab on the left) to update the button styles and then save your changes. |
Step 4: Users Complete The Form
When users complete the form, then the information in the form transmits back to Content > Ad Manager > Sponsors & Advertisers.
|
Tip: If the same sponsors tend to come back year after year, you may want to create a Renewal Catalog. A catalog will allow a renewing sponsor to pay the fee without re-submitting all of their company's information and creating a duplicate profile within StarChapter. |