Create a Member Application
Member applications must be built as a Member type form within StarChapter. A Member form will create a member profile in Membership > Member Manager. Based on the configuration of the form, associated dues, and group setups, there are many ways to manage local memberships within StarChapter. This article reviews how to create a new form, but all StarChapter systems have a default Member Application form that can be edited to save some time. If a new form is needed that should be similar to an existing Member form, use the Copy button within Form Builder to save time.
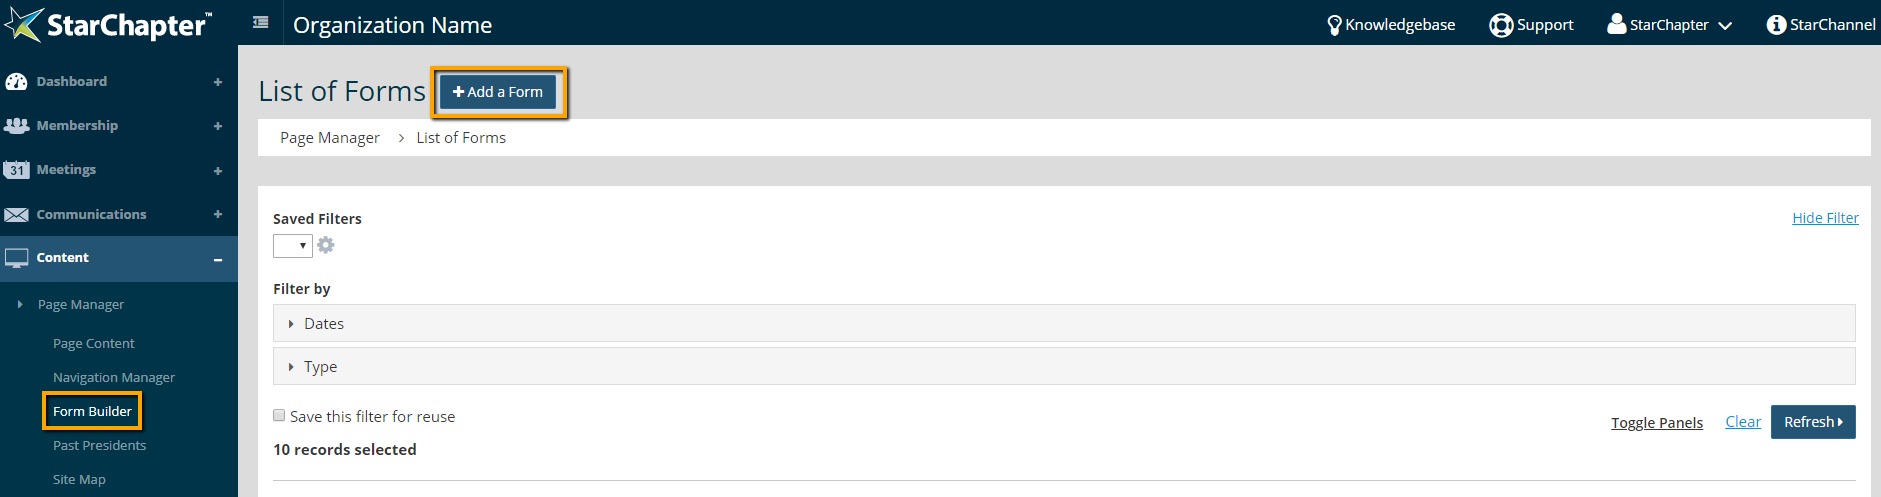
- Go to Content > Page Manager > Form Builder.
- Click Add a Form.
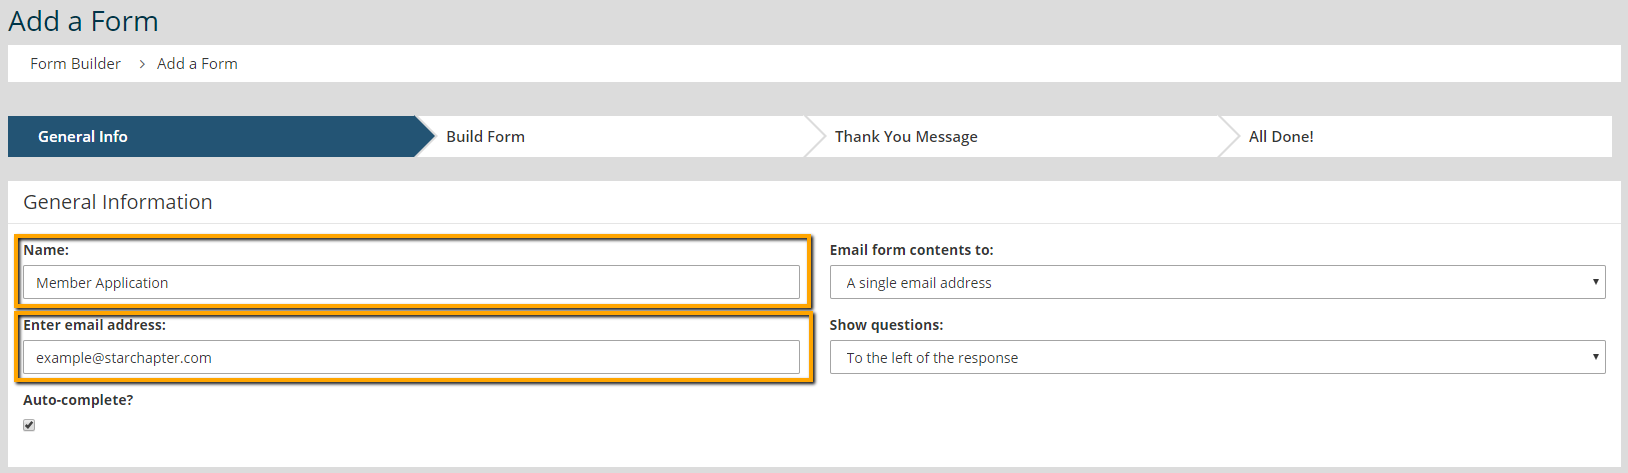
- Name the form. This name will appear as the page title for the new form.
- Update the "Enter email address," if someone other than the Default chapter contact should receive submission notifications.
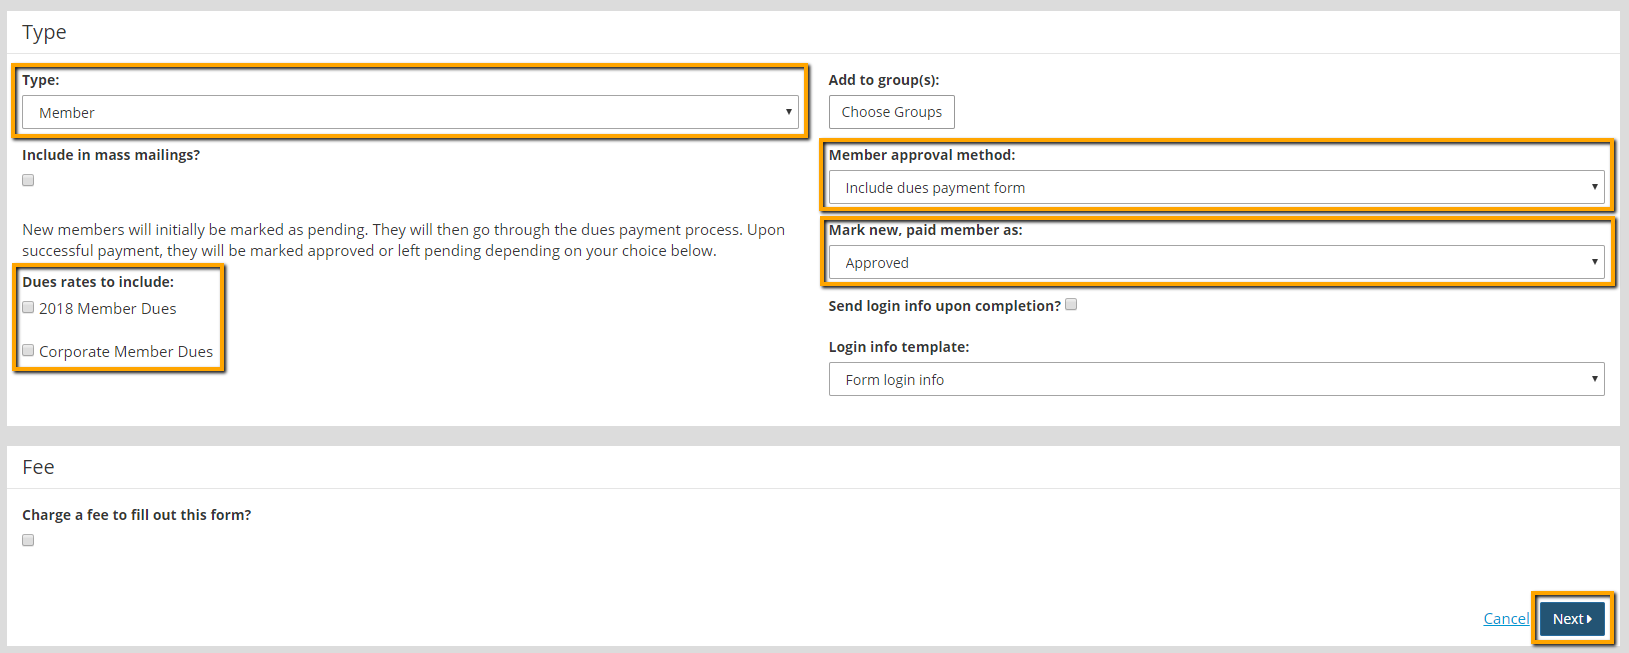
- In the "Type" field, select "Member."
- In the "Member approval method" field, select "Include dues payment form."
- In the "Mark new, paid member as" field, select whether applicants should be added to the Member Manager as an "Approved" or "Pending" member when their application and dues payment are received.

Tip: When a Member Form is submitted, a Pending member profile will be created. This setting indicates whether it should be auto-approved upon receipt of dues payment. If a form submission is made and dues are not received, the profile will remain in a pending status regardless of other settings. In this situation, reach out to the applicant to determine if they are mailing payment. If not, click the Move to Non-Members button on their profile to remove them from the Member Manager. If they are still interested in membership, direct them to re-apply and complete the entire application and dues payment process.
- In the "Dues rates to include" field, check the dues that should be available on this application form.
Tip: If this application form is specific for a particular member type or other group that has been setup in Membership > Group Manager, use the "Add to group(s)" field to define that group. With this set, all submittors will automatically be added to that member group.
- Click Next.
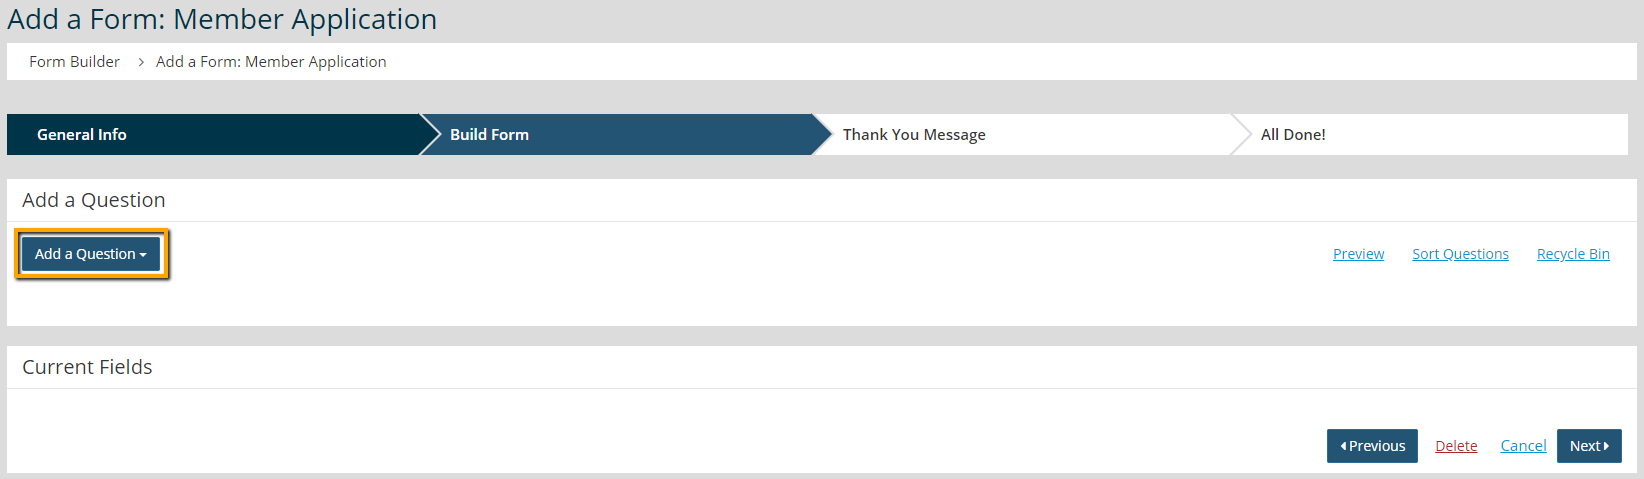
- Click Add a Question and select the type of question or layout to add.
- If a Question type was selected, enter the "Question title" and "Help Text," if necessary.

Warning: You must add a "Select a Group" question to your Member Application if your Member Dues Settings are set to "Restrict dues to members in eligible subgroups". Locate this Member Dues setting under Membership > Settings > Dues tab > Dues and group assignments. If you do not add a "Select a Group" question, new members will not be able to view and select a dues level to purchase when signing up. Please see Dues Settings Impact On The Member Application for more information.
- In the "Table Field," select the member field where this information should be saved in the member profile.
Warning: If a Table Field is not select, submitted information will not be saved to Member Manager. This can result in blank member profiles.

- Click Save.
- If a Layout type was selected, enter a "Comment title" (internal designation only) and a "Comment" (the text to be displayed on the form.)
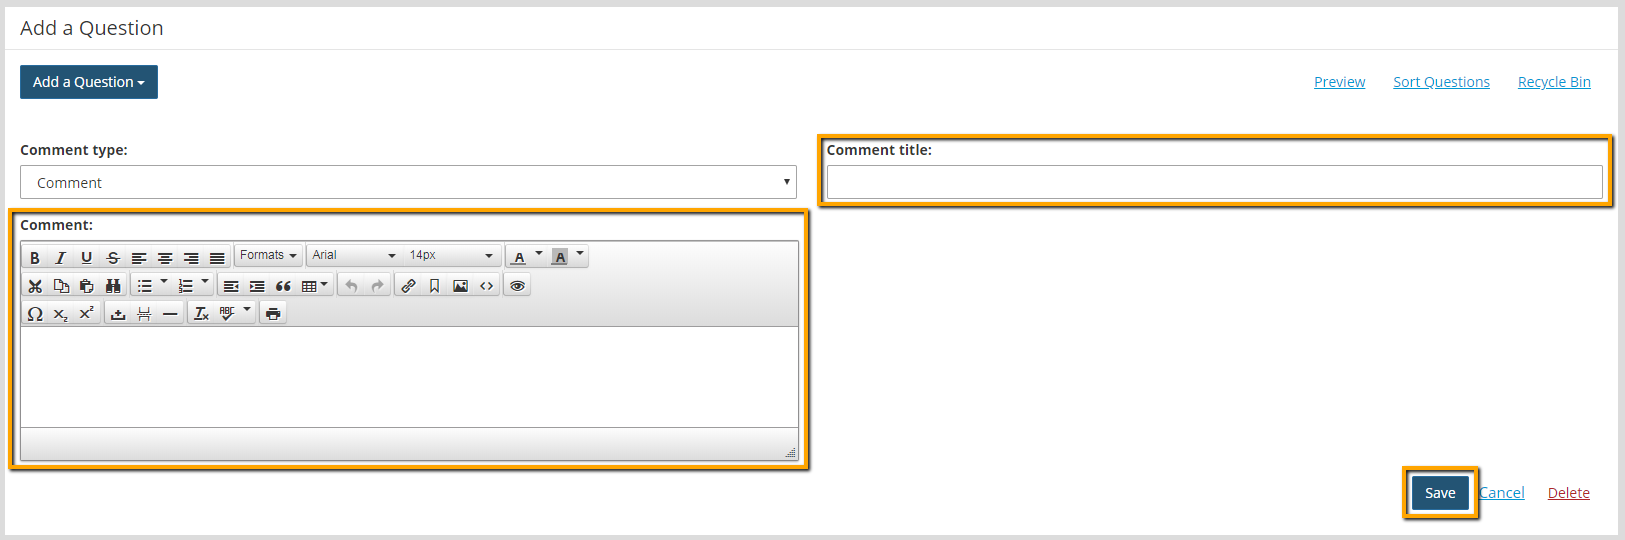
- Click Save.
- Repeat creating form questions and comments as needed.
- Click Preview to see a mock-up of the form.
- Click Sort Questions and drag/drop questions into the desired order, if needed.

- Click Next twice to complete the form setup.