Dues Settings Impact On The Member Application
Table of Contents
Overview
Under the Membership > Settings > Dues tab, there is the setting labeled "Dues and group assignments". This setting affects how your Members select and purchase dues through your Member Application and during Membership Renewal.
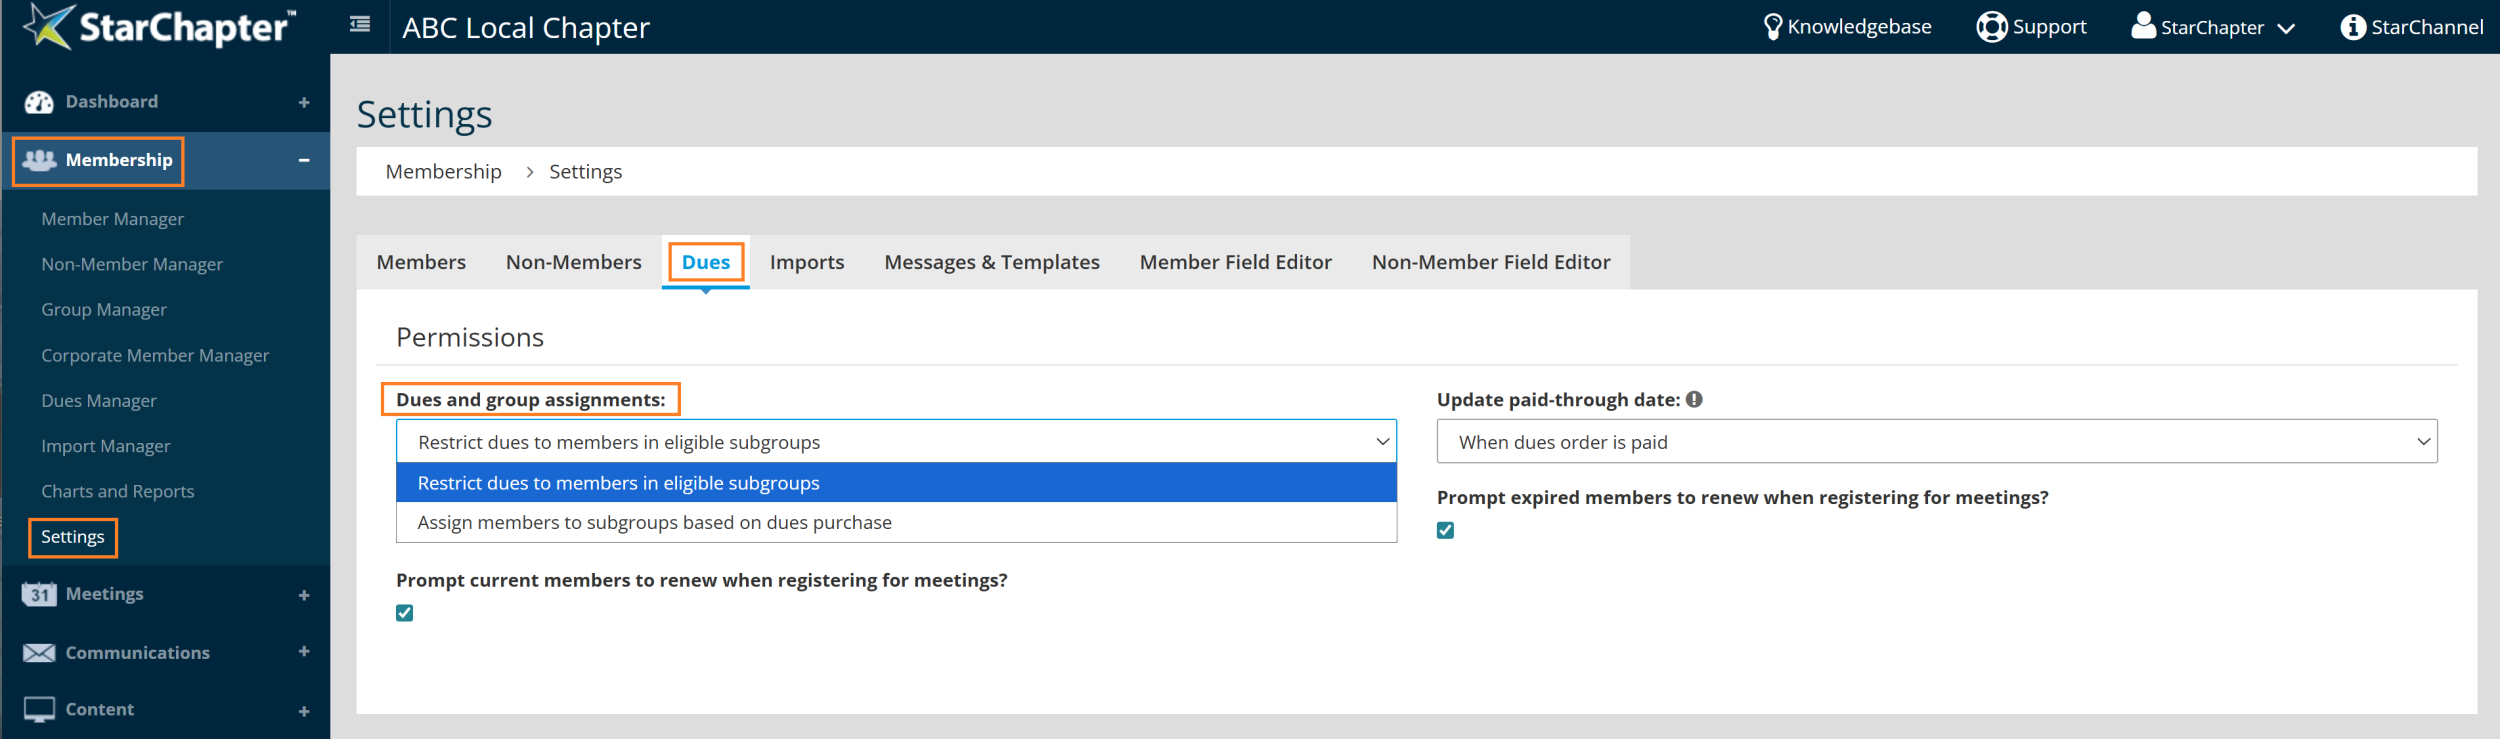
Option 1: "Restrict dues to members in eligible subgroups" : This setting restricts the dues available for purchase. Members will only be able to access the dues rate for their selected membership level, which corresponds to a specific member subgroup. When enabled, new members must choose a Subgroup on the member application before selecting and paying dues. These Subgroups belong to the Group linked to your Member Dues—typically “Member Types,” though this Group may have been renamed or changed.
Option 2: "Assign members to subgroups based on dues purchase" : This setting means that regardless of a member's current subgroup, they will automatically be assigned to the related subgroup they have selected when they purchase a specific dues rate. If you select this option, all dues rates will be available to all members.
 |
Warning: If you have selected Option 1: "Restrict dues to members in eligible subgroups", you must add the "Select a Group" question to the Member Application or new members will not be able to view and select a dues rate to purchase. |
AdD THE "SELECT A GROUP" QUESTION TO THE MEMBER APPLICATION
If your Dues and Group Assignment setting is "Restrict dues to members in eligible subgroups", follow these steps to add the "Select a Group" question to the Member Application.
- Go to Content > Page Manager > Form Builder.
- Search for "Member Application" or by "Member" using the Type Filters.
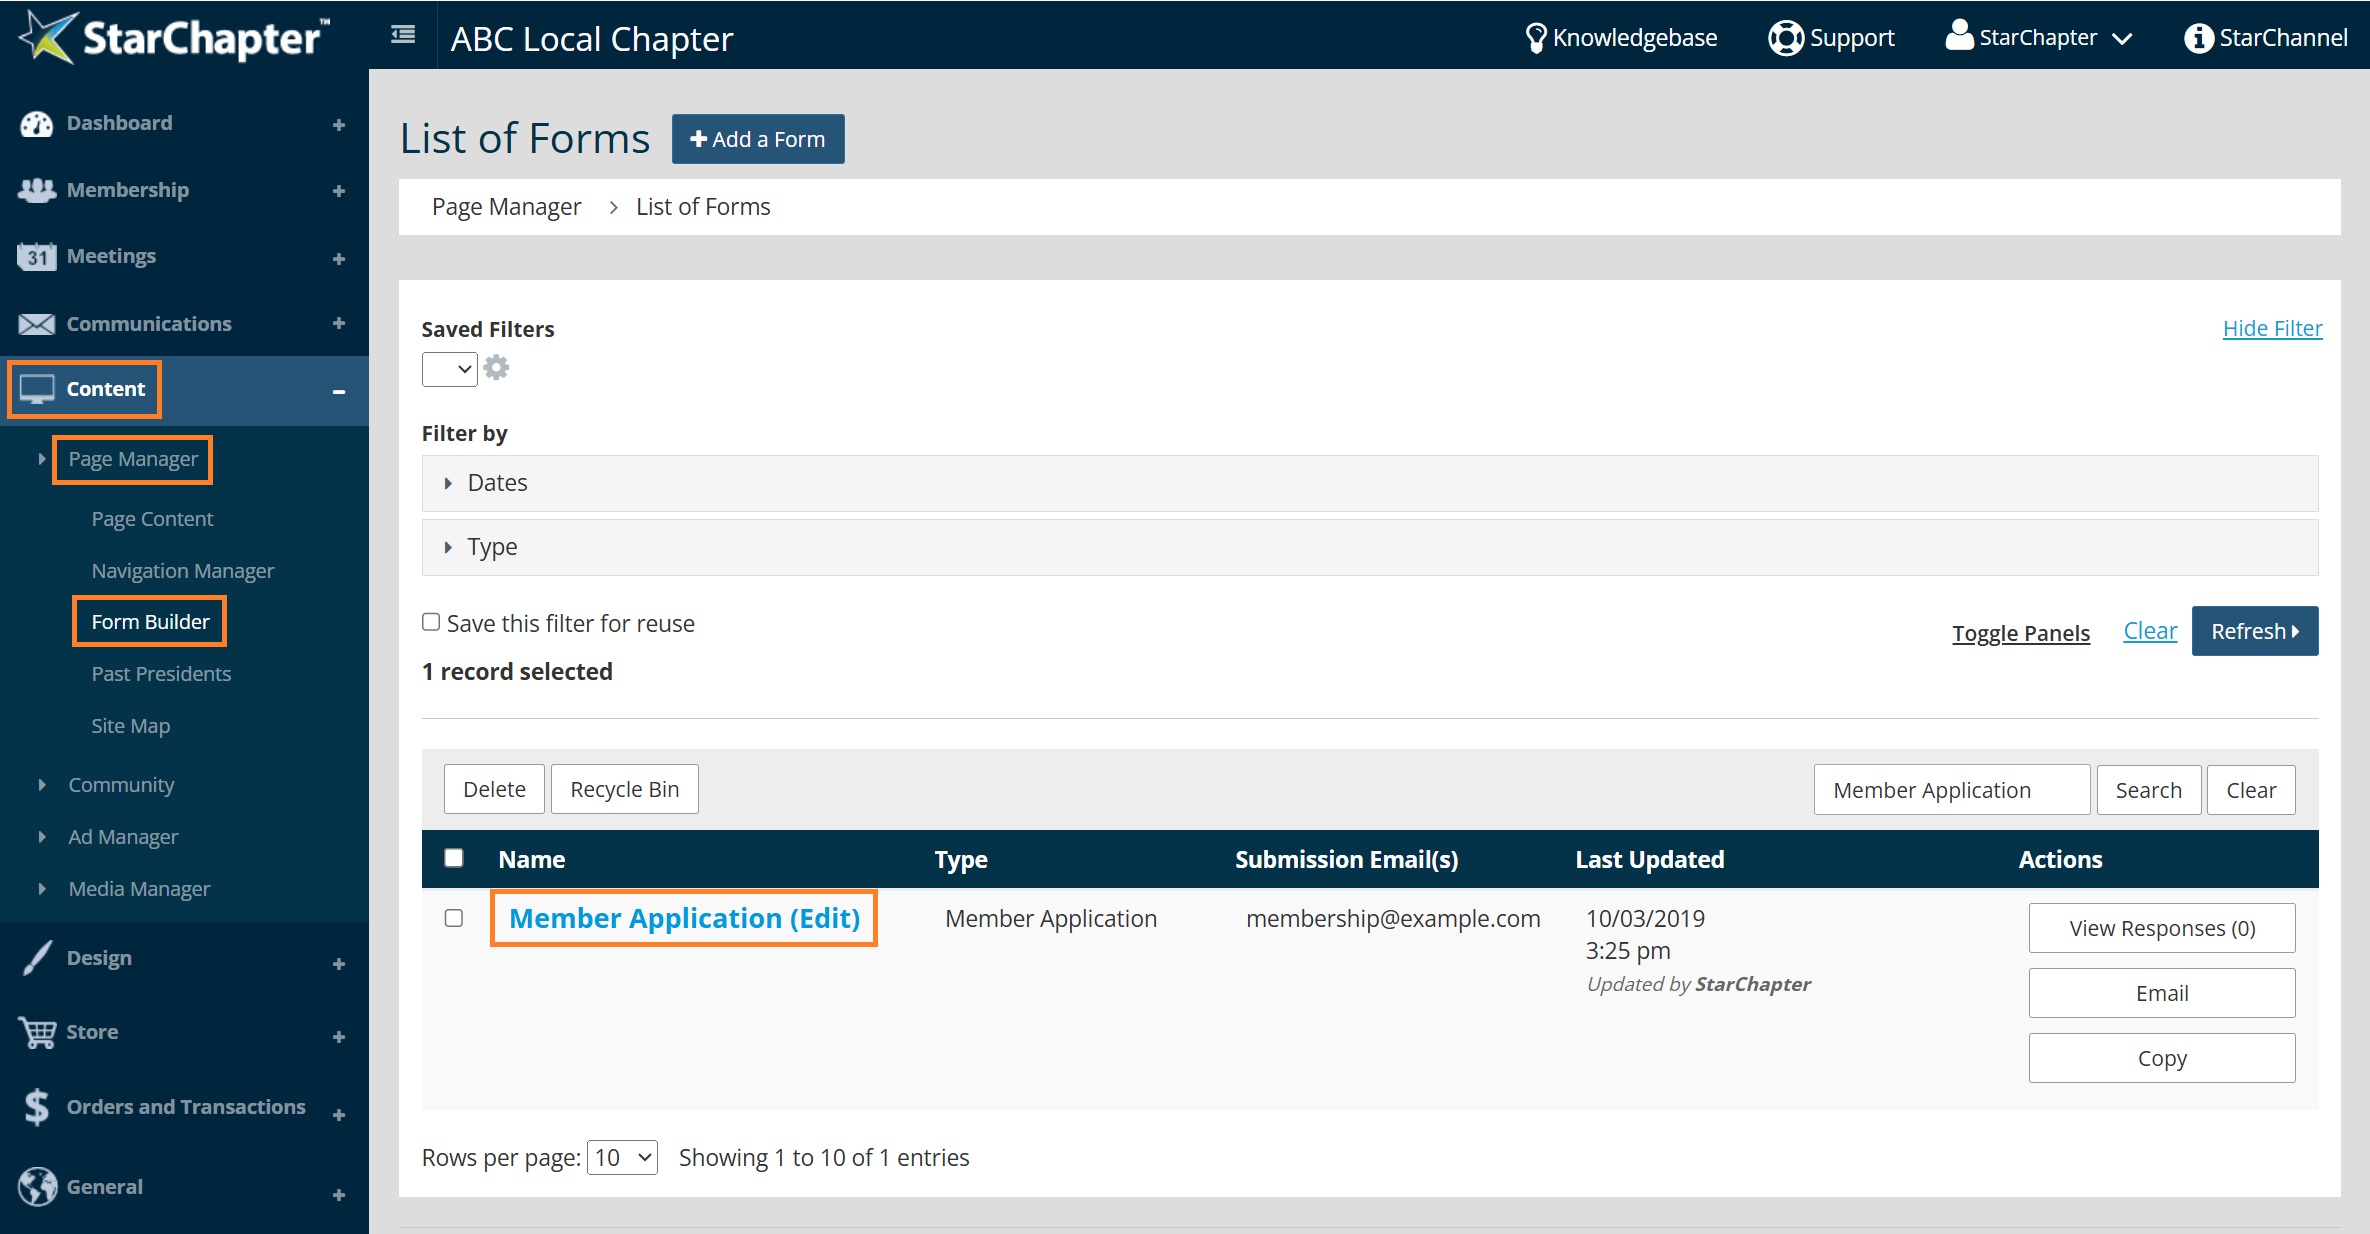
Warning: You may have more than 1 Member Application. If that's the case, be sure to add a "Select a Group" question to each Member Application.
- Click on the blue hyperlinked name of your Member Application to make edits.
- Scroll down to the "Build Form" section, click Edit.
- Click on the Add a Question button.
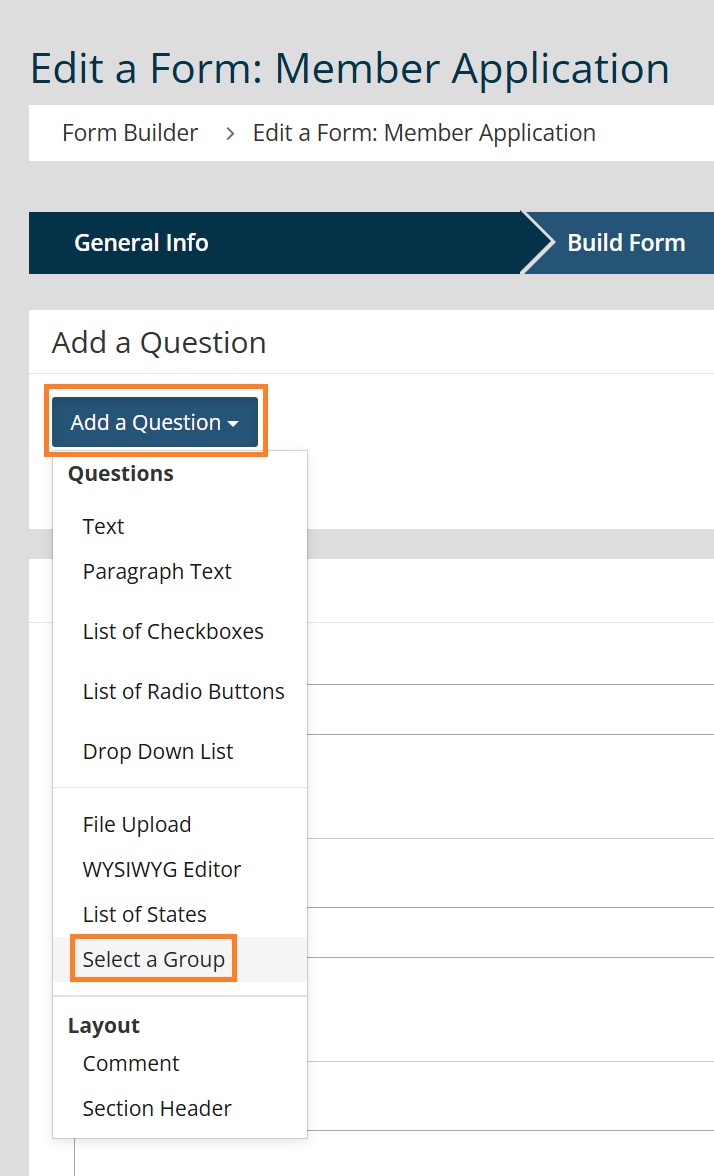
- Click Select a Group in the drop-down menu.
- Complete the form.
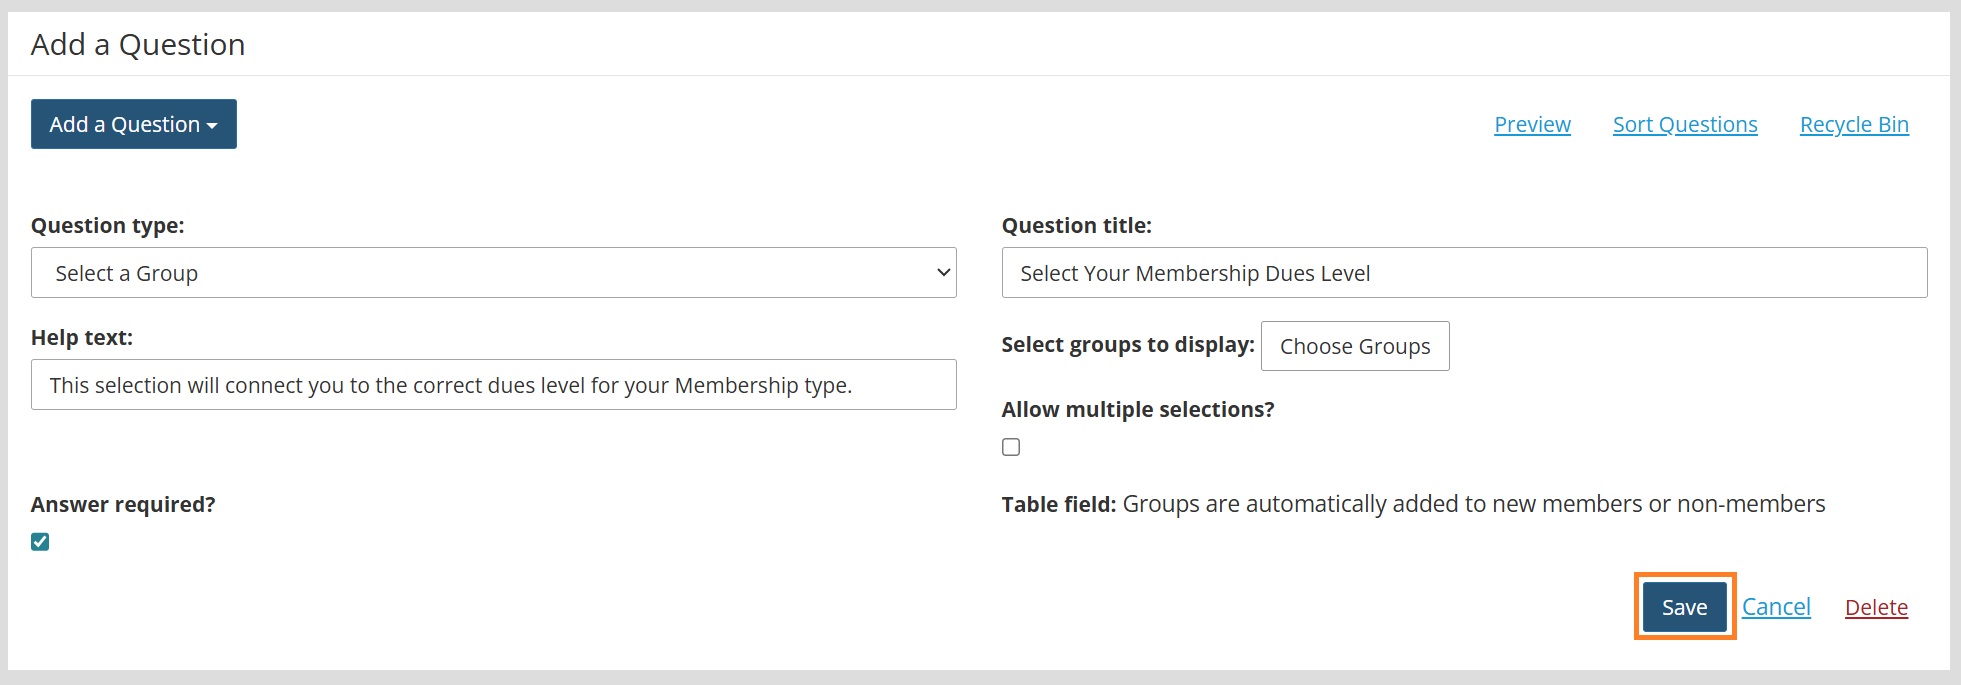
- Question Title: Suggested wording is "Select your Membership Level" or "Select your Membership Dues Level".
- Help Text: Text here provides additional context on why or how to select the correct Membership Level/Group.
- Select Groups to Display: The groups selected here will display to new Members when completing the application. The group they select will directly correspond to the dues available for purchase.
- Allow multiple selections: Do not check this box. Members cannot belong to multiple Member Types.
- Answer Required: Check this box to require an answer to this question.
- Click Save.
- Scroll down to bottom of page, click Next to update your application.
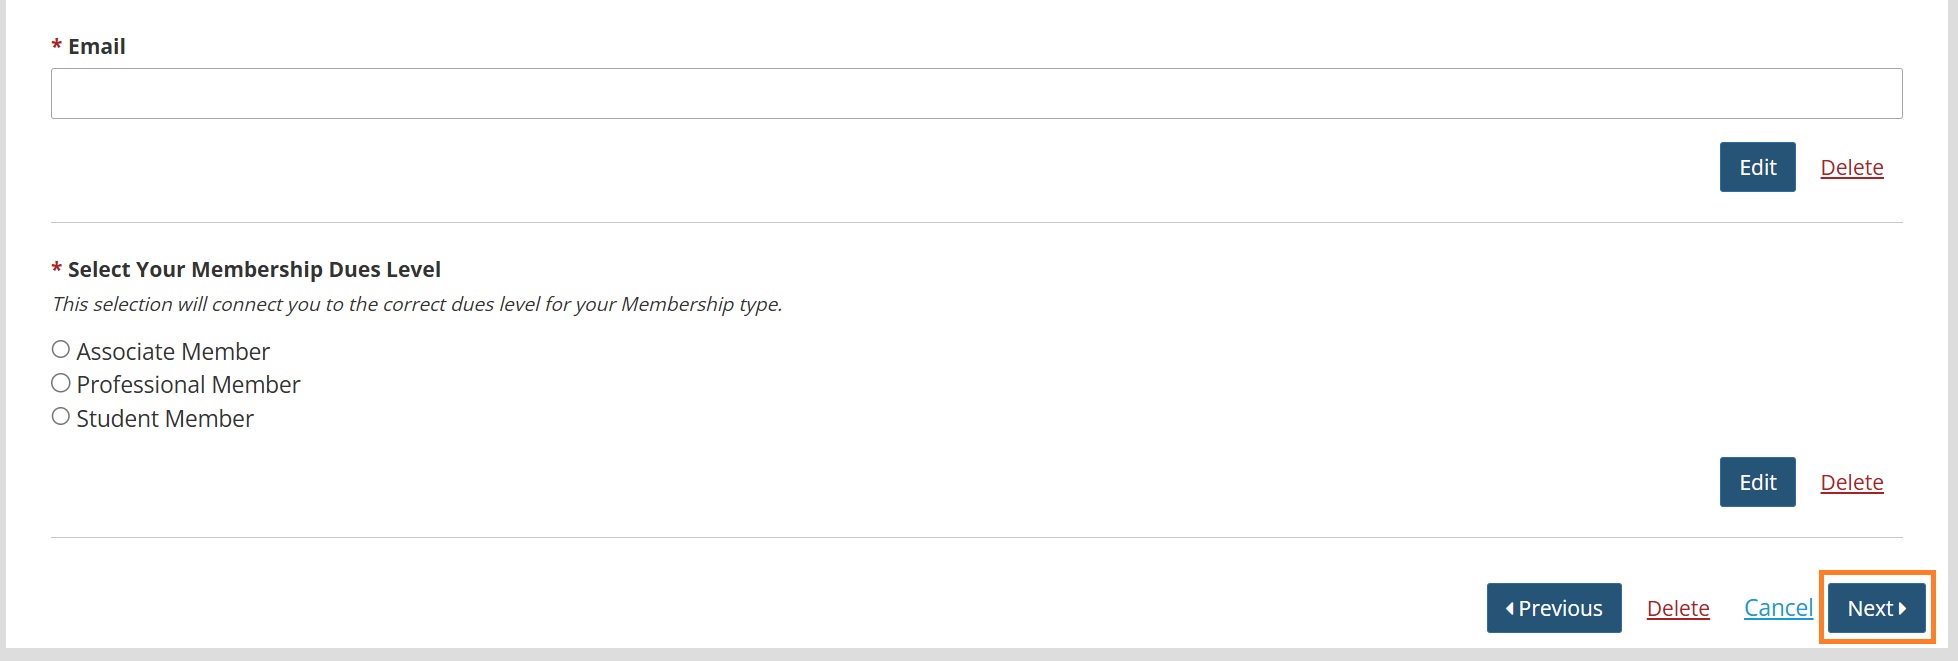
- Test your Member Application: Go through the Member Application process using test data to ensure new members will have the experience you expect. Use test data such as Member Name: Test Test, and email address: [email protected]
- Check to see if the "Select a Group" question appears and functions as expected.
- Make sure that once your test member selects a group, the correct dues appear for purchase.
- Delete your test Member Profile when testing is complete.
Troubleshooting
Issue: "Select a Group" question is missing or not showing up on your application.
- You may have forgotten to save your changes when adding the question to your application. Make sure to complete all steps above, including step 7.
- You may have more than 1 Member Application. Ensure you have added the "Select a Group" to each of your Member Applications.
Issue: Members can’t select a dues rate after applying.
- Check that a "Select a Group" question added to each of your applications. Follow directions here.
- Check that there are active and current Dues, and that they are being used on your application form. Follow directions here.