Collect Resume Submissions
The Classifieds tool within Content > Ad Manager can be used to manage resumes, in addition to job listings and general ads. Resumes require a slightly different form setup since the primary submission will be the resume file itself. A collection form should be created and then a page to list only Job Seekers can include that form link.
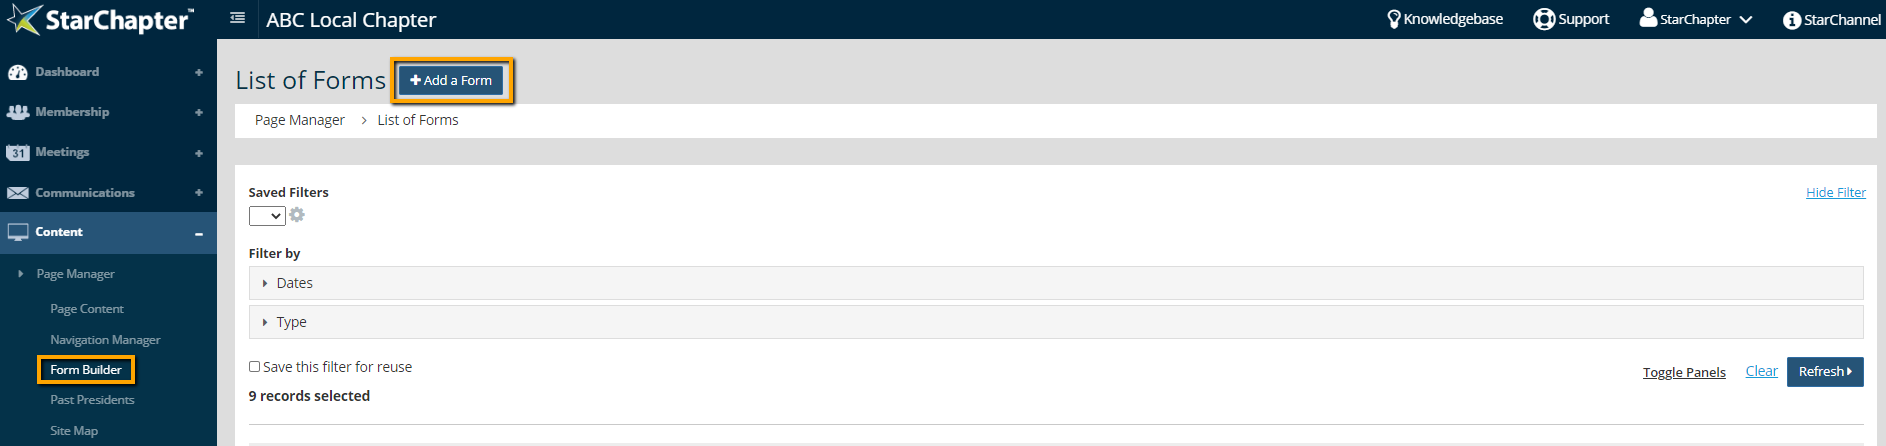
- Go to Content > Page Manager > Form Builder.
- Click Add a Form.
- Name the form clearly.
- Update the "Email form contents to" and "Enter email address" fields to ensure that the correct chapter leaders receive submission notifications.

- If resume submission should be restricted to members or any particular group of members, click the Add Restrictions button and follow prompts to add those restrictions to the form.
- Set the "Type" field to "Classifieds."
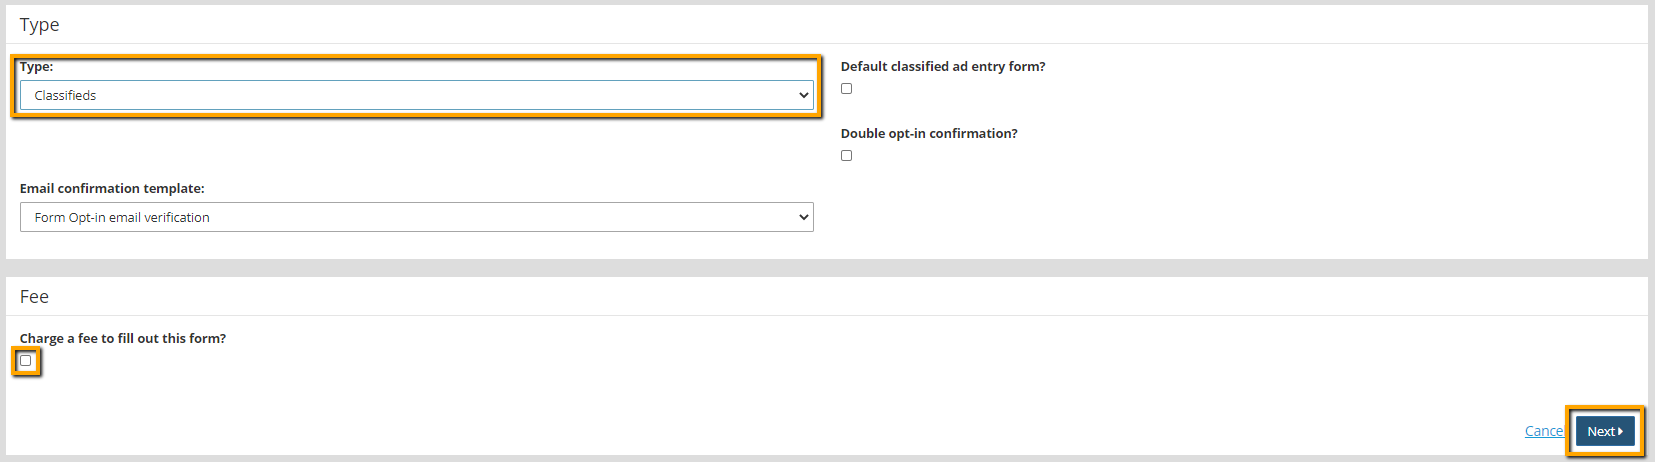
- If charging for resume submissions, enable the "Charge a fee to fill out this form?" setting and enter the cost.
- Click Next.
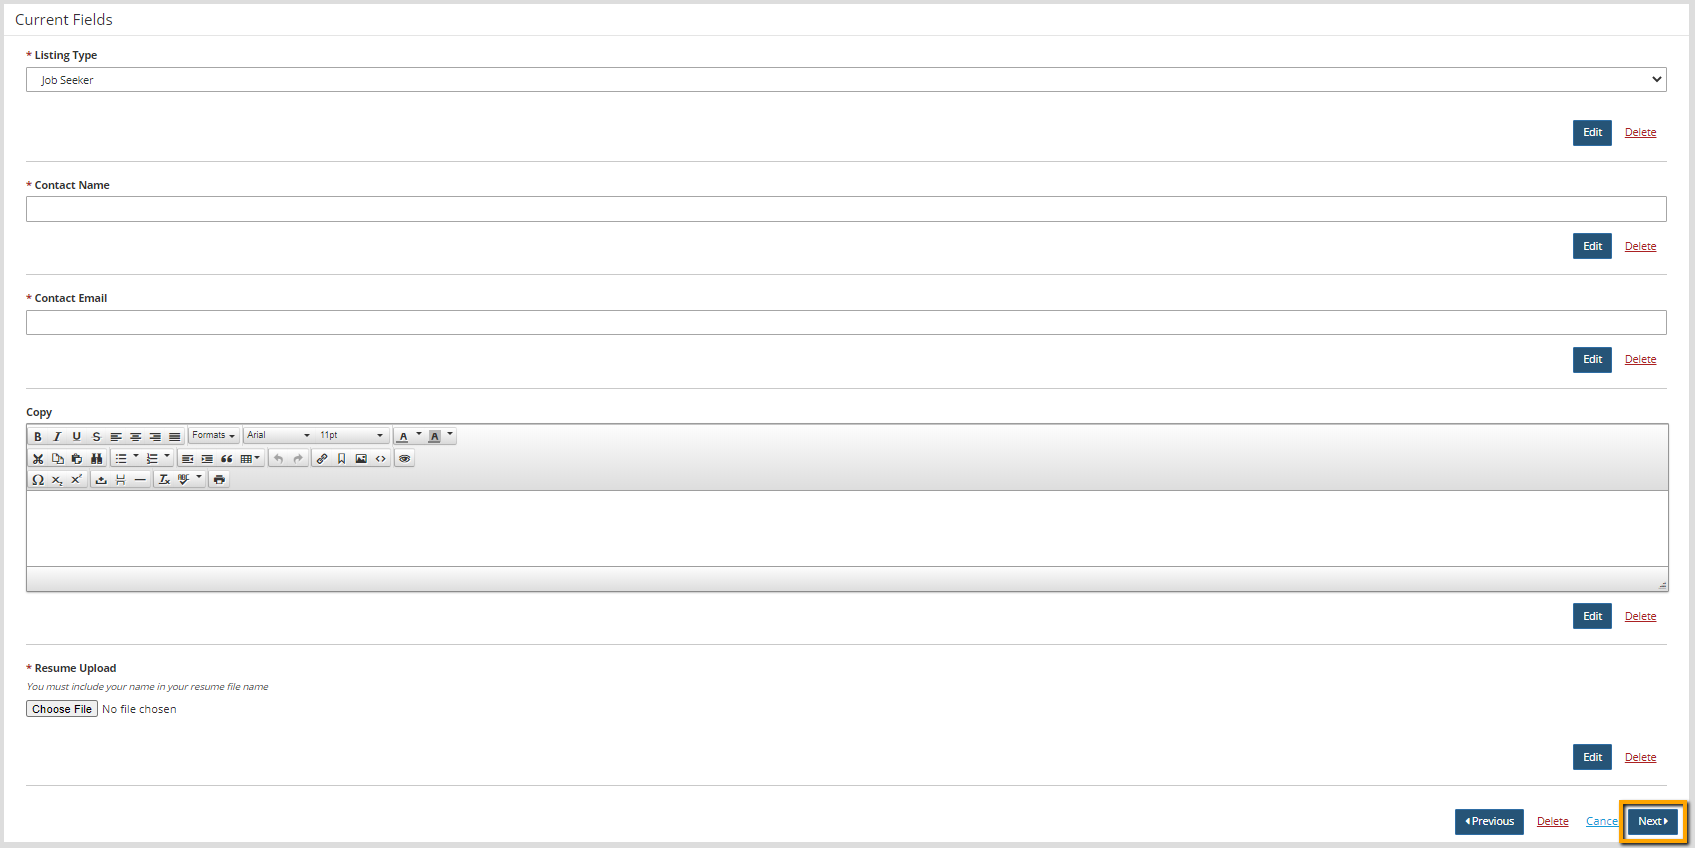
- Click Add a Question and select Ad Type.
- Click the Xs beside Classified Ad and Job Listing to remove those as options.
- Check the "Answer required?" option to ensure that the submission will be set to "Job Seeker."
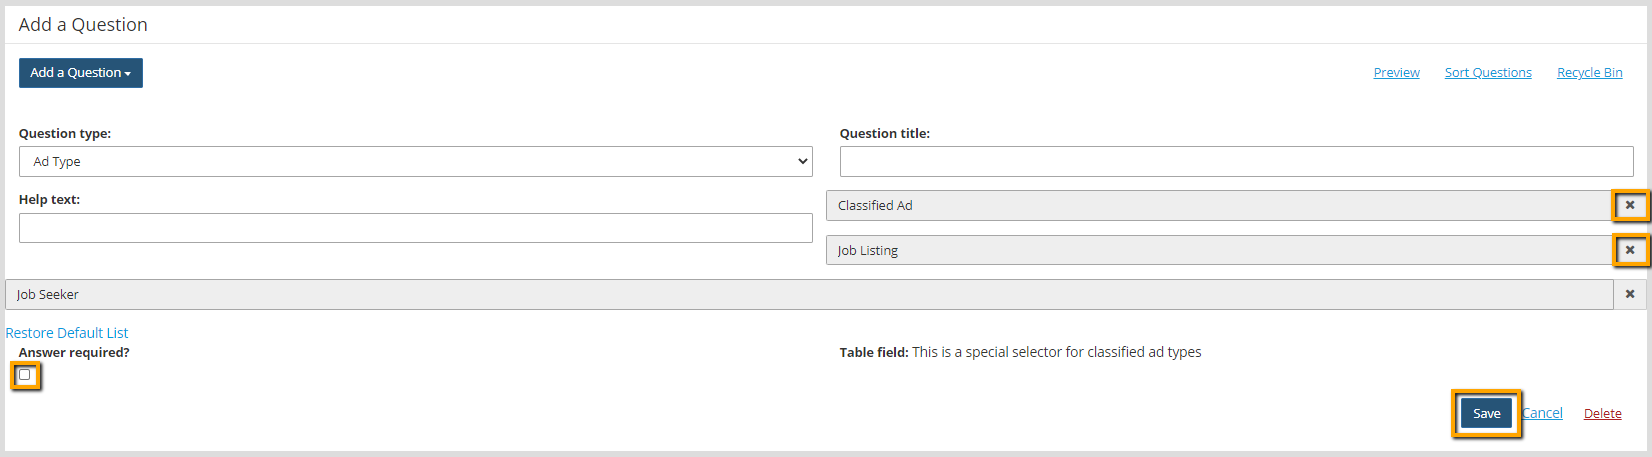
- Click Save.
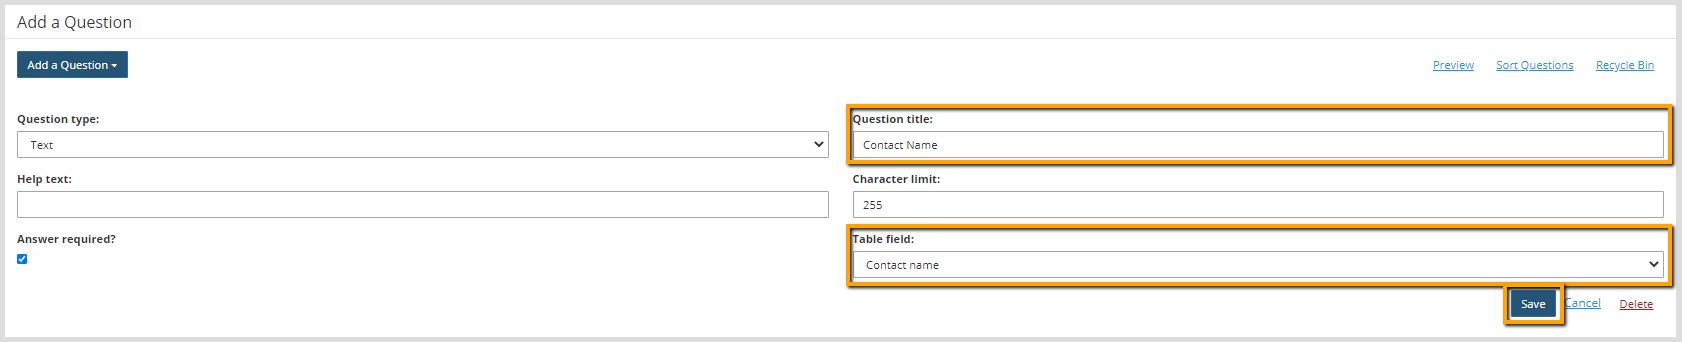
- Click Add a Question and select Text.
- Add "Name" or "Contact Name" to the Question Title field.
- Select Contact Name in the Table Field drop-down menu.

Tip: The Table Field indicates where the information should be saved. If no Table Field is selected, the information will be collected but not saved to the Classified tool within the system.
- Click Save.
- Add the following additional questions to the form:
- Question Type: Text, Question Title: Contact Email, Table Field: Contact Email
- Question Type: WYSIWYG Editor, Question Title: Copy, Table Field: Body of ad
- Question Type: File Upload, Question Title: Resume Upload, Table Field: Attachment File
- Click Next.
- Update the Thank You messages, as appropriate.
- Click Next.
- The form is automatically published, but if it is to accompany resuming listings, a create a page for that purpose.