Change an Email Build Layout
As priorities change, content changes. To ensure that content is organized in a useful way that suites your needs, the layout of emails can be changed as needed. Containers from 1 to 5 columns are available and these containers can be nested inside of one another for more flexibility.
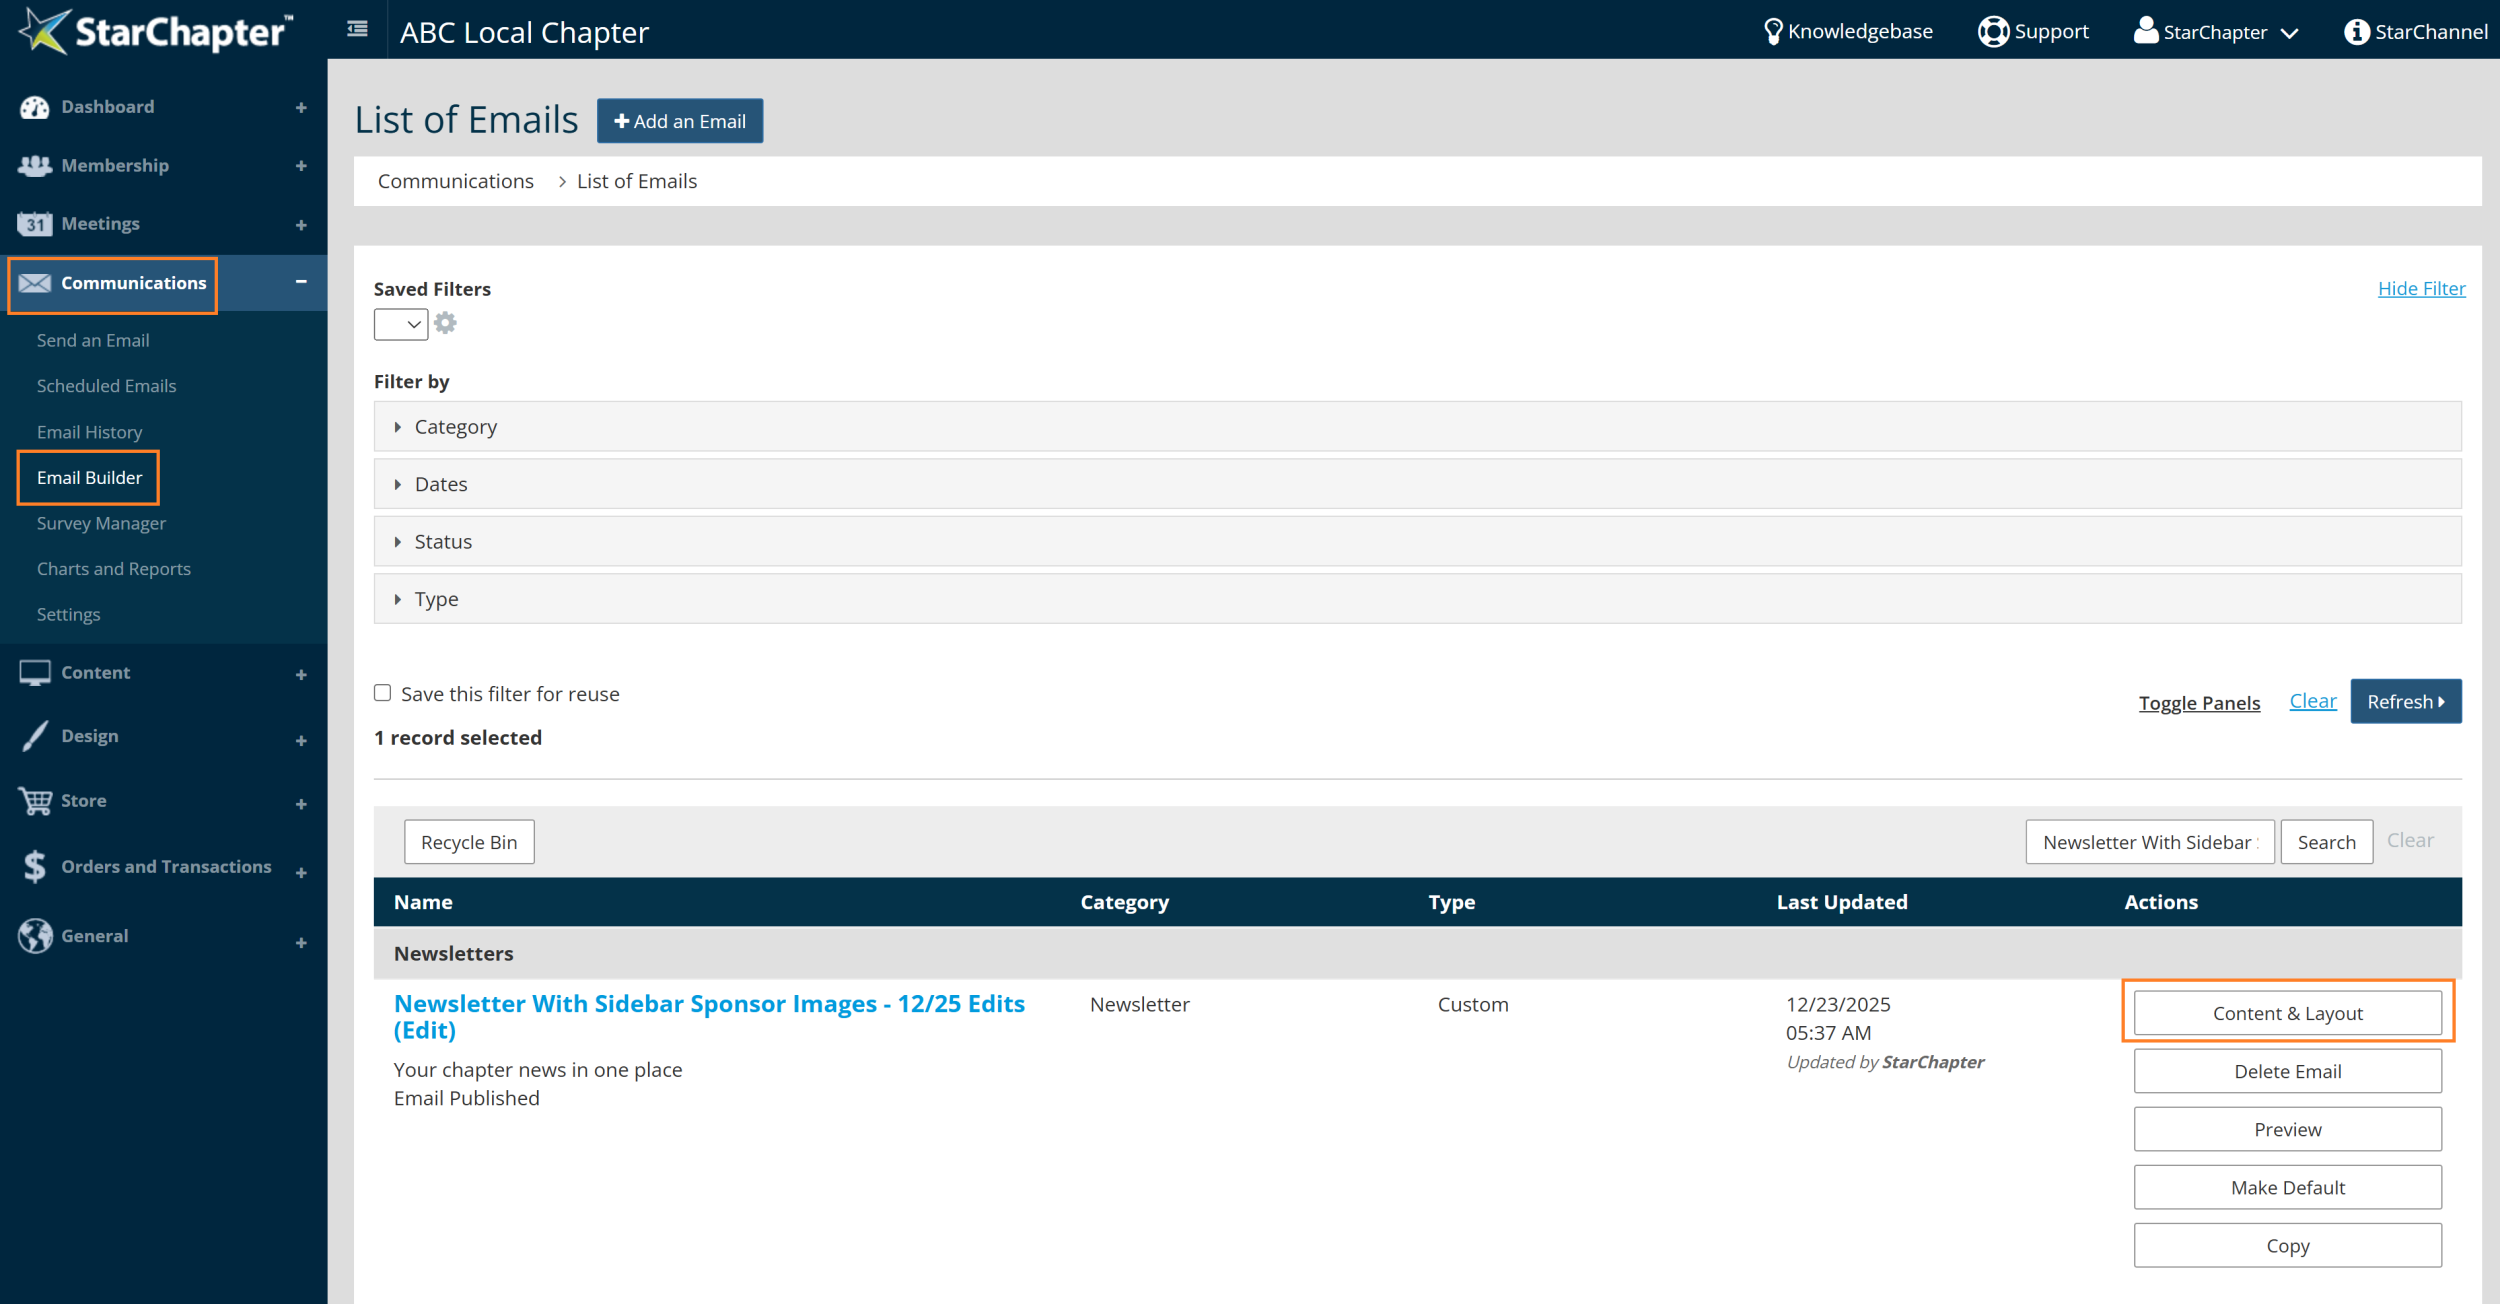
- Go to Communication > Email Builder.
- Search for the Email Build of interest.
- Click the Content & Layout button in the actions column on the right of that Email Build.

Tip: In many cases, a copy of the Email Build will need to be made so that edits can occur. If no Content & Layout button is present, click Copy, then OK. Update the email build "Name" field (optional but recommended), then click Next.
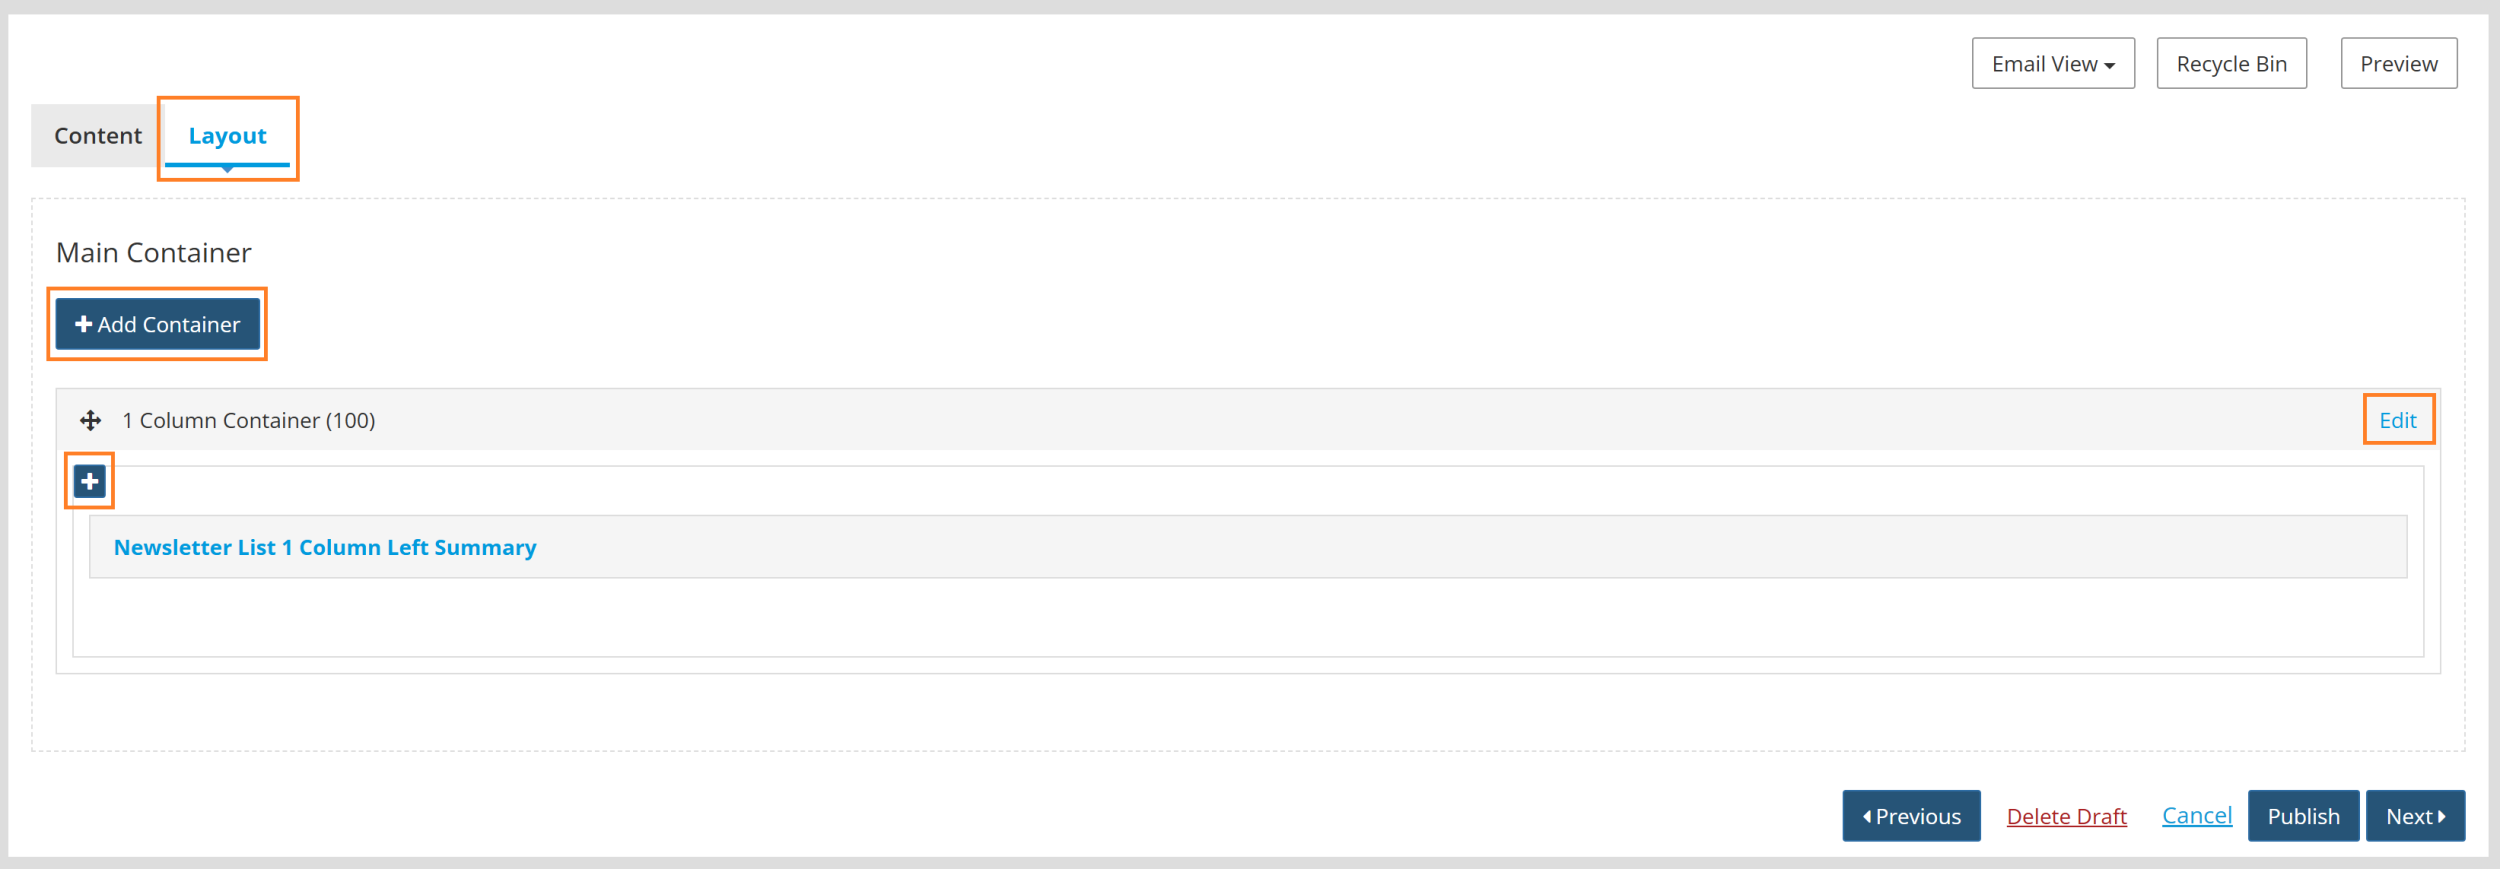
- Go to the Layout tab.
- Click Add Container to add a new container to the Email Build, click Edit on an existing container to change its structure, or click the blue plus sign within any existing container to nest a new one within. For this example, the container will be edited.
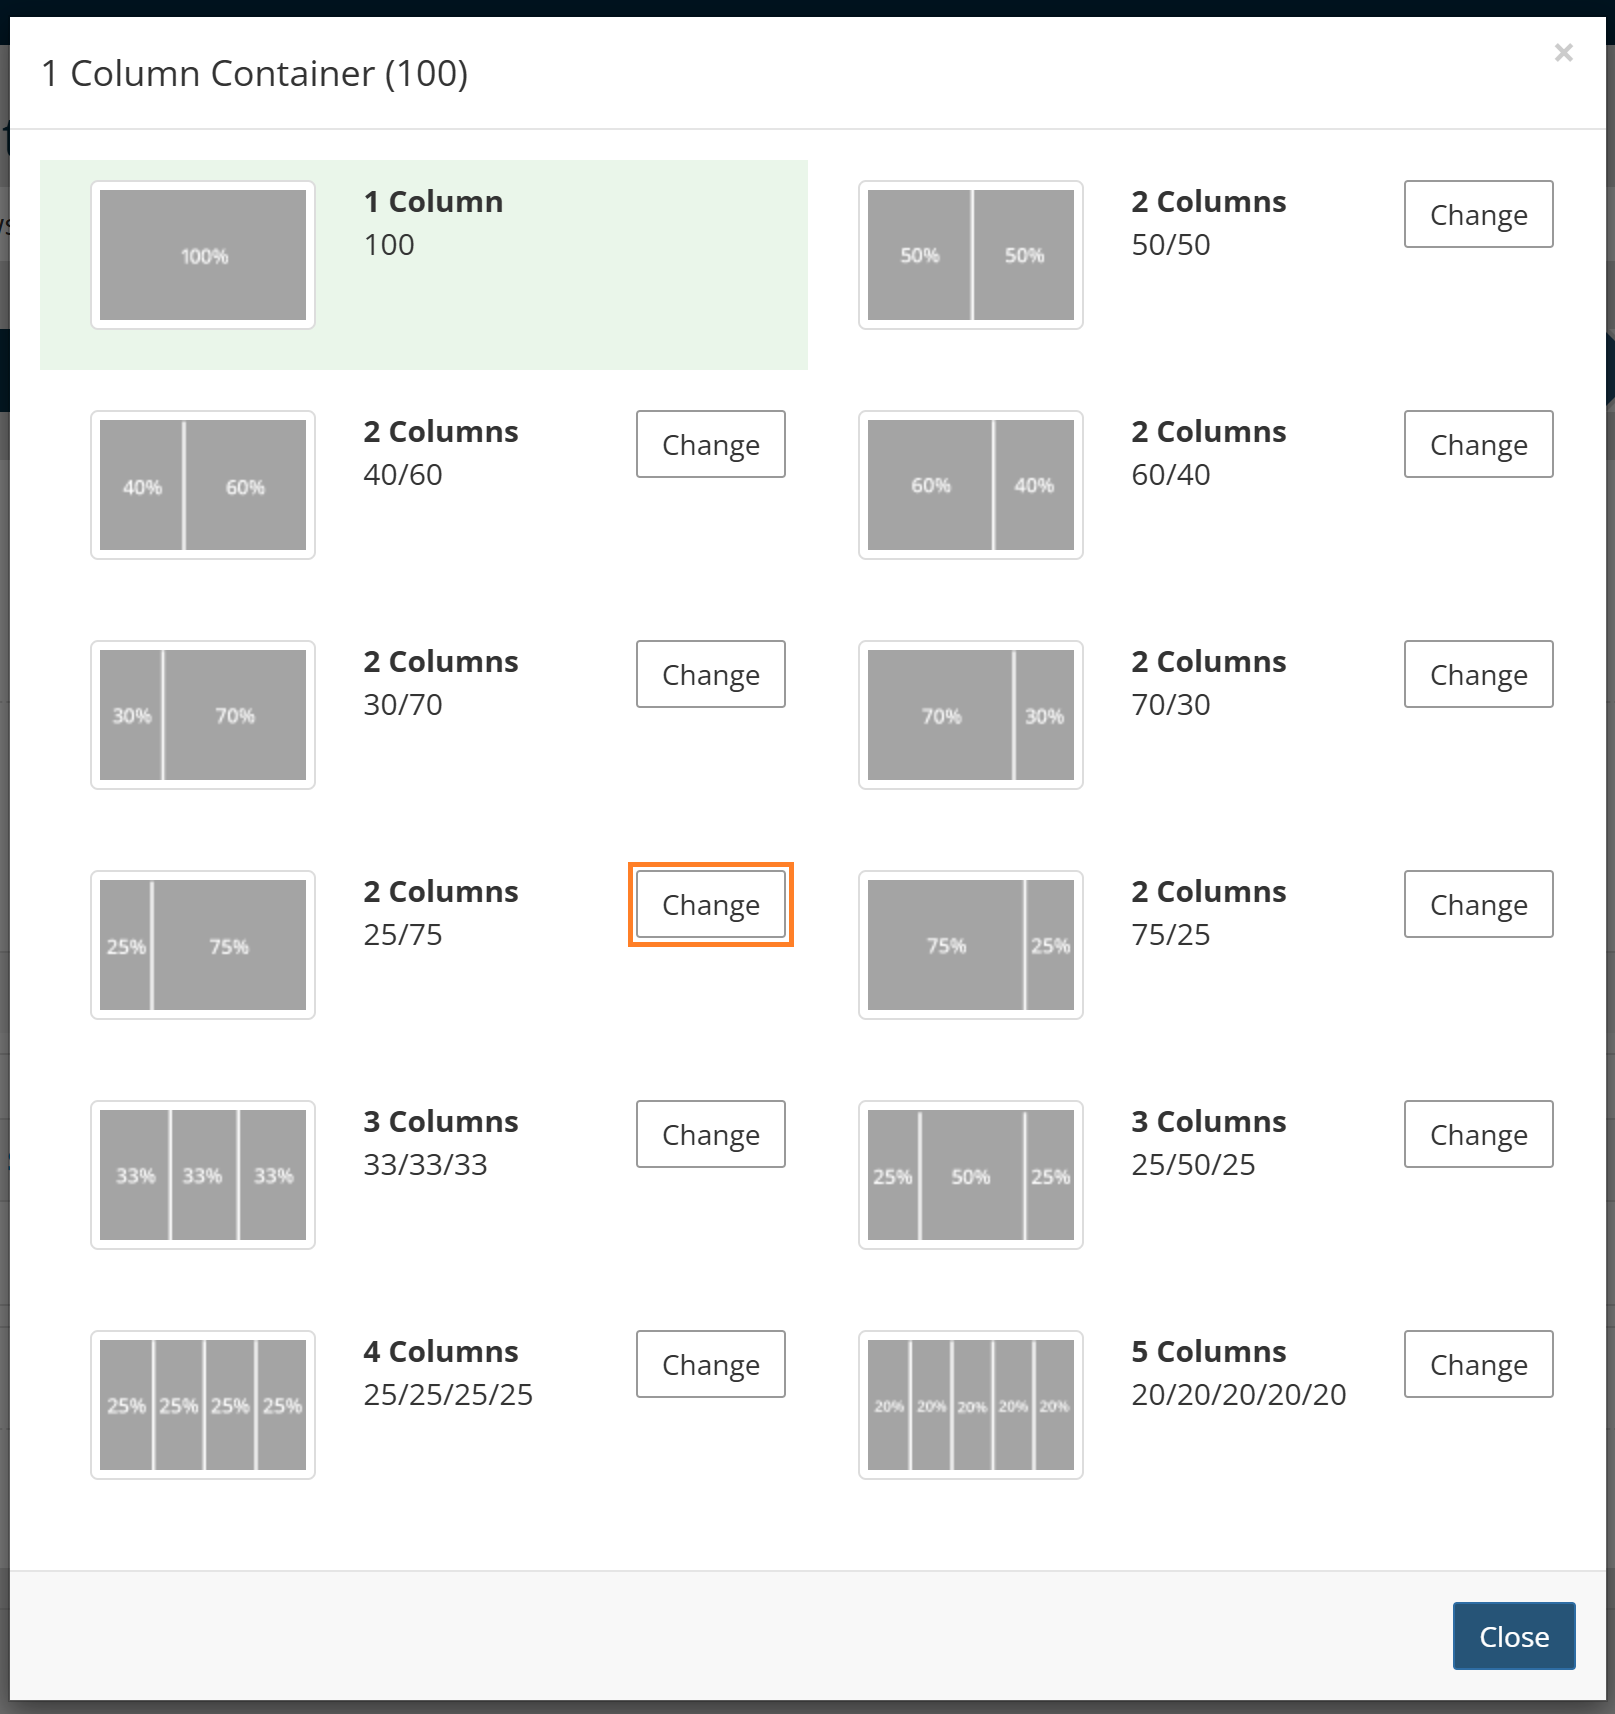
- Click Change on the column structure of your choice.
- Go to the Content tab.
- Drag and drop content sections into the new container or click the blue plus sign to add new content sections.
- When all containers and content are in their preferred places, click Publish.
Before the Layout Change

After the Layout Change

|
Tip: If you made a new copy of an Email Build, you may want to make this your Default Email Build. To learn more about Default Email Builds, please see the Change Default Email Build article. |