Resolve Duplicate Registrations
There are various causes of duplicate registrations. While StarChapter can prevent duplicate member registrations, non-member tickets don't require a login and therefore cannot be cross-checked as member tickets can. Duplicate registrations occur when the registrant forgets about their original registration, because two different people purchased the tickets, or because the submit button on the payment screen was double-clicked. In any of these cases, the solution is to cancel one of the orders and refund any funds in excess of a single registration.
- Go to Meetings > Meeting Manager.
- Click the Registration button on the event with duplicate registrations.
- Search for the individual's name who has two registrations.
- Decide which order will be canceled. This should be the order with the least number of additional tickets and/or without an associated payment.
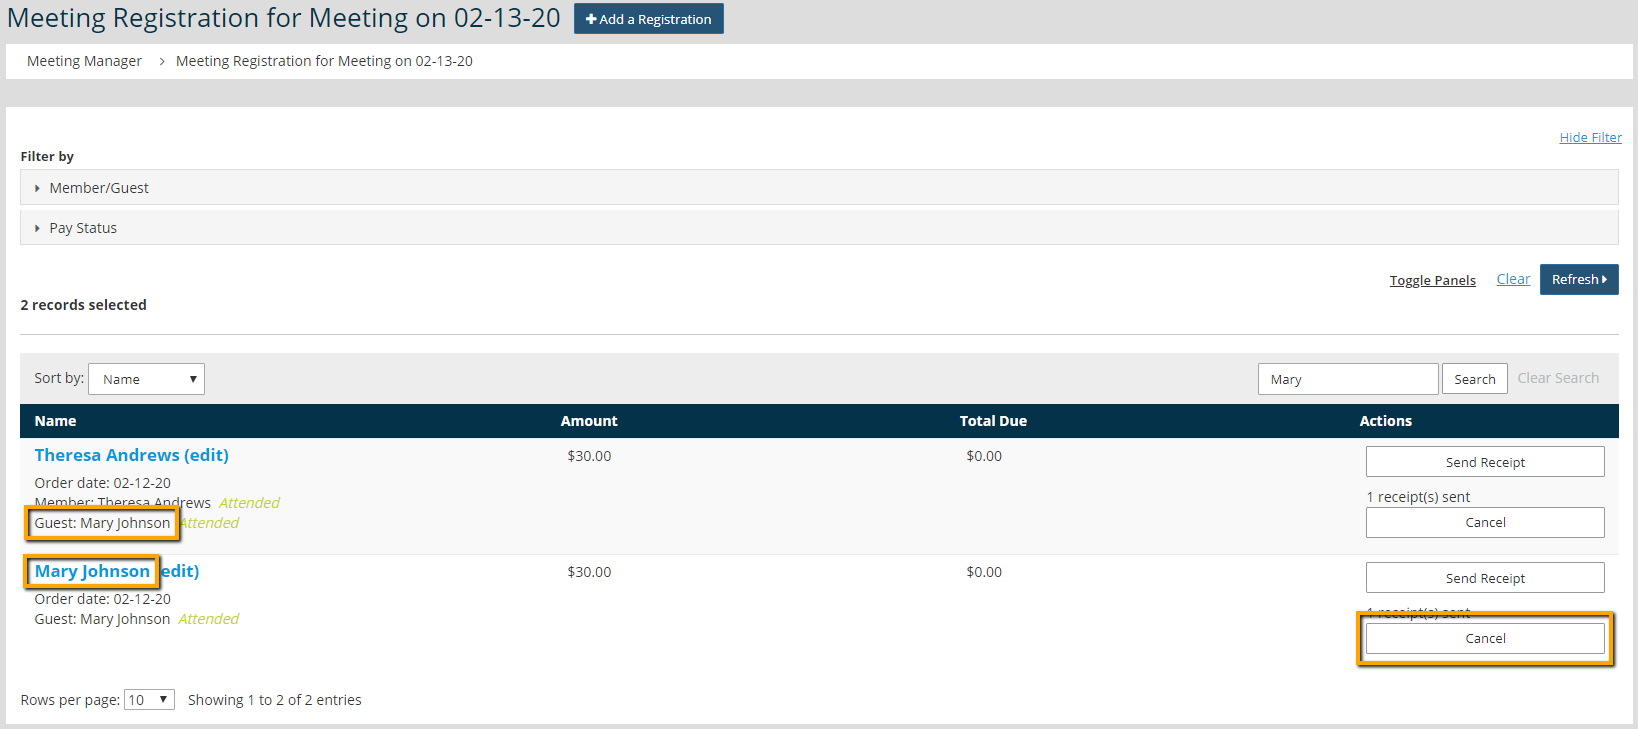

Tip: In the example above, cancelling the order placed by Theresa would require re-registering Theresa. Cancelling the order purchased by Mary only effects her ticket. Since both orders have been paid and both would require a refund, the least disruptive option is to cancel the order with the single ticket.
- Click the Cancel button for the selected order.
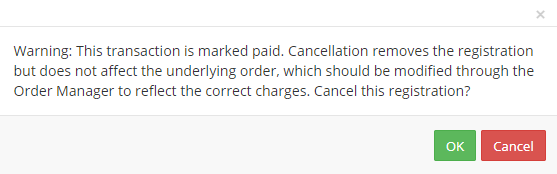
- In the pop-up window, click OK to acknowledge that additional steps are needed to note the refund. If the order was not paid, this is the final step of the cancellation. If the order was paid, continue to step #7.
- Go to Orders & Transactions > Order Manager.
- Search for the order associated with the cancelled registration. Either the order number or the name of the purchaser can be used. The order will have "Cancelled Registration" listed on the order table.
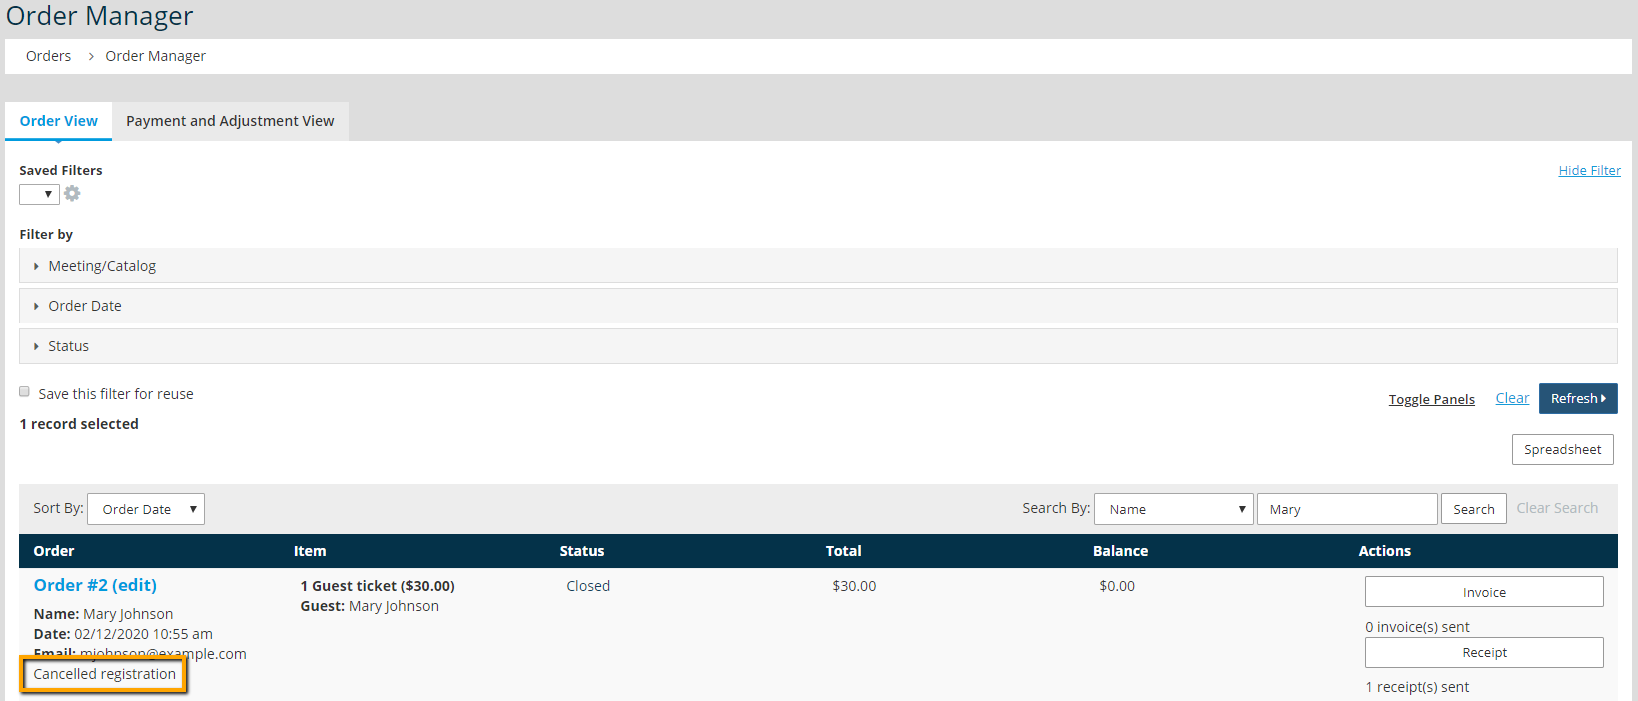
- Click the Order # to edit the order.
- Click the Add an Adjustment button in the Adjustment Details section of the order.
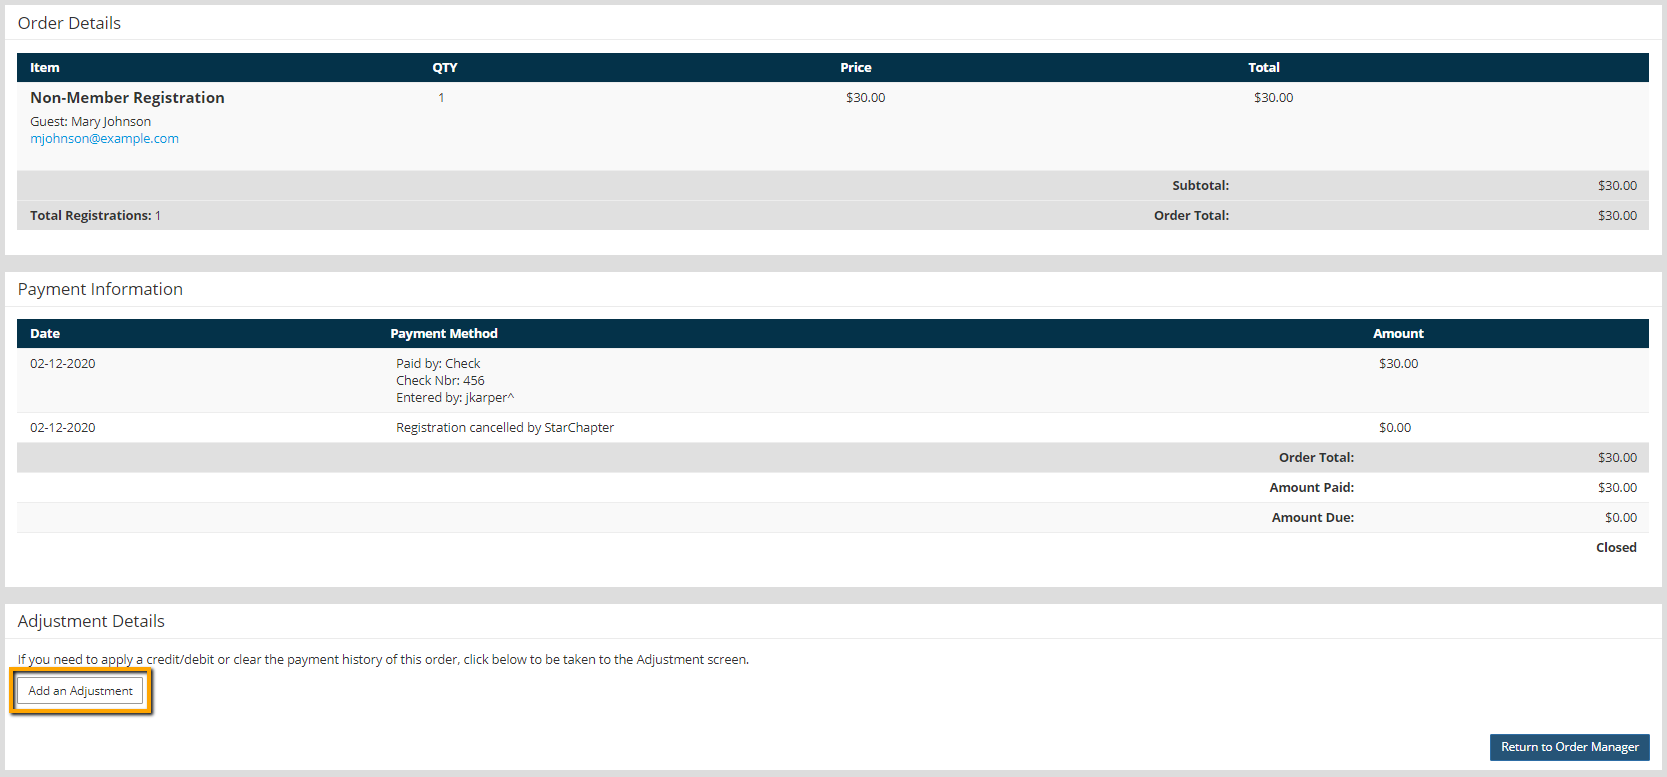
- Select "Credit" for the "Adjustment Type" and leave yourself or your treasurer a "Comment" regarding the reason for the refund.
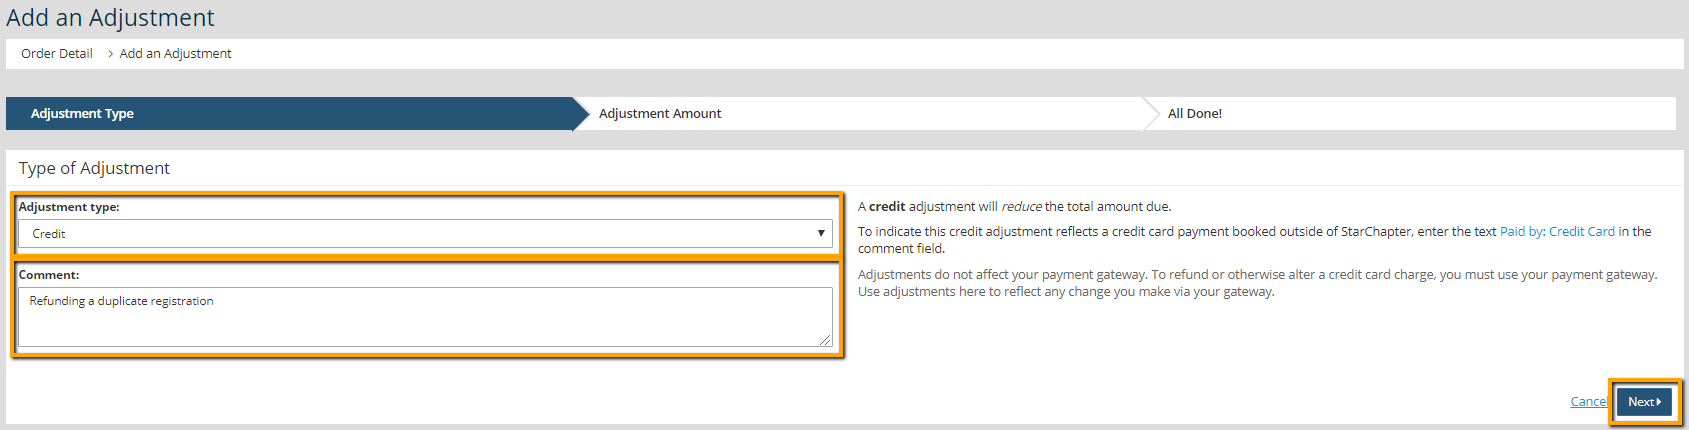
- Click Next.
- Enter the cost of the refund in the "Credit Amount" field.
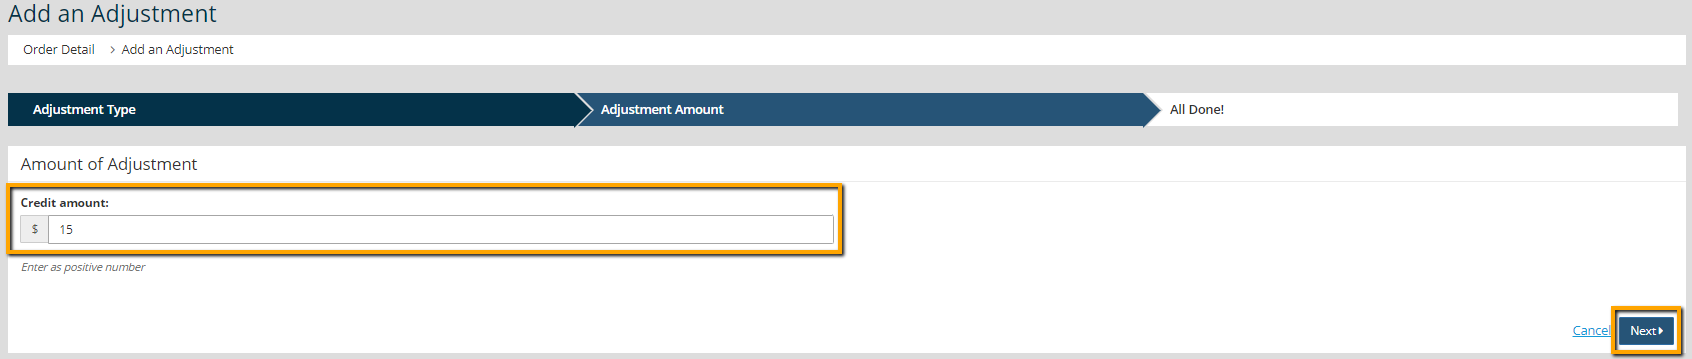
- Click Next.
- Click Return to Order Detail.
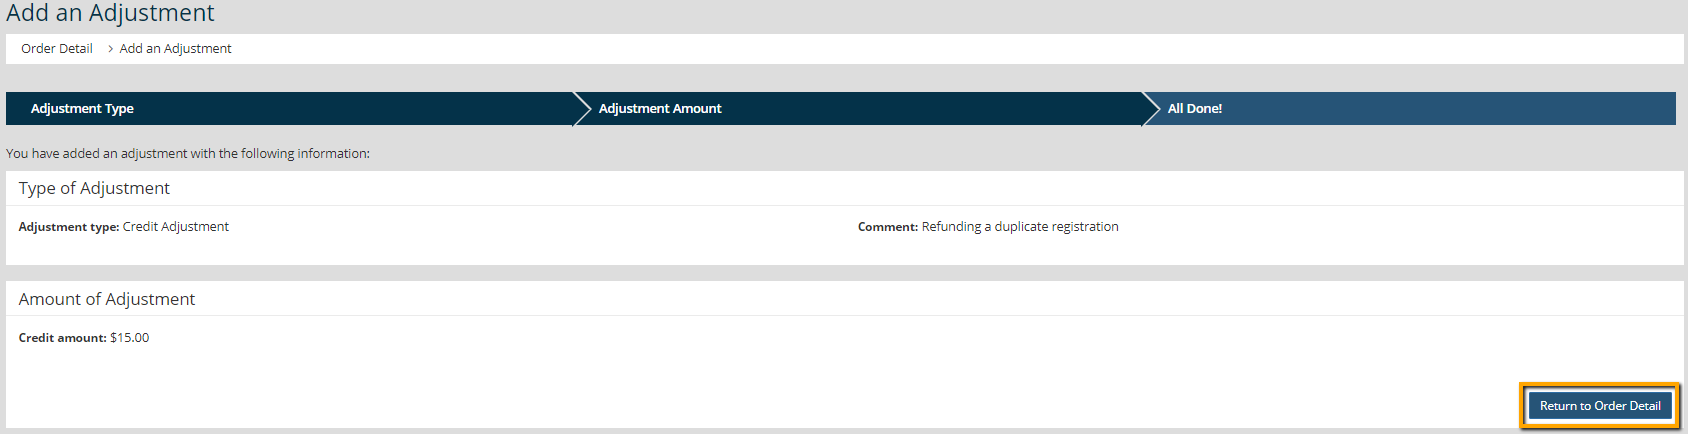
- Click the Add an Adjustment button again.
- Select "Close Remaining Balance" in the "Adjustment Type" field.
- Click Next.
- In the pop-up window, click OK to confirm this final adjustment.

- Complete the funds transfer through your organization's payment gateway or payment service account.