Manage Meeting Check-In
If possible, run a check-in table at each event. In this one stop, each registrant can ensure that their attendance is noted, receive their badge, and pay balances or they can purchase a ticket if you allow walk-in registrants. StarChapter provides an easy way to do this in the system using a laptop or tablet. Several admins can be logged in at the same time to expedite the check-in process.
Prior to Opening the Doors
- Go to Meetings > Meeting Manager.
- Click Registration on the appropriate meeting.
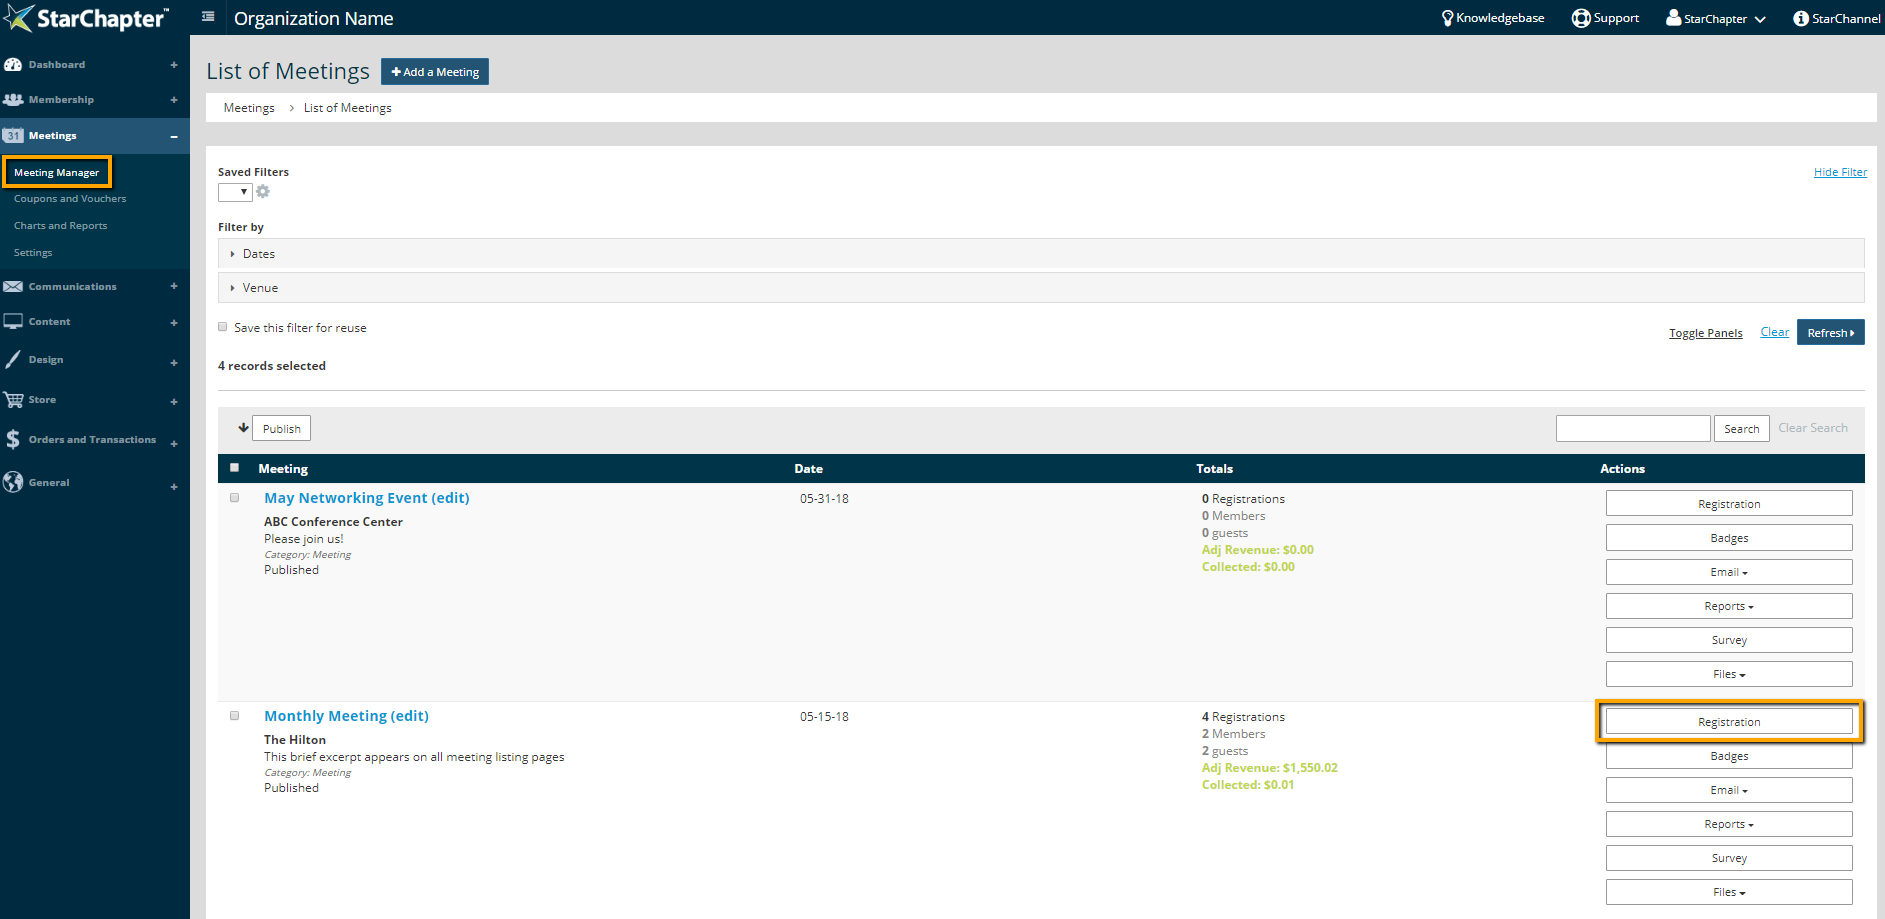
 |
Tip: Even when laptops or tablets are available, a paper registration list is a good back-up. Print the Meeting Registration Detail as a back-up to using the Registration page. |
Check-In a Registrant
- Enter the registrants first or last name in the Search box.
- Click Search.
- Click "Did Not Show" to toggle it to "Attended."
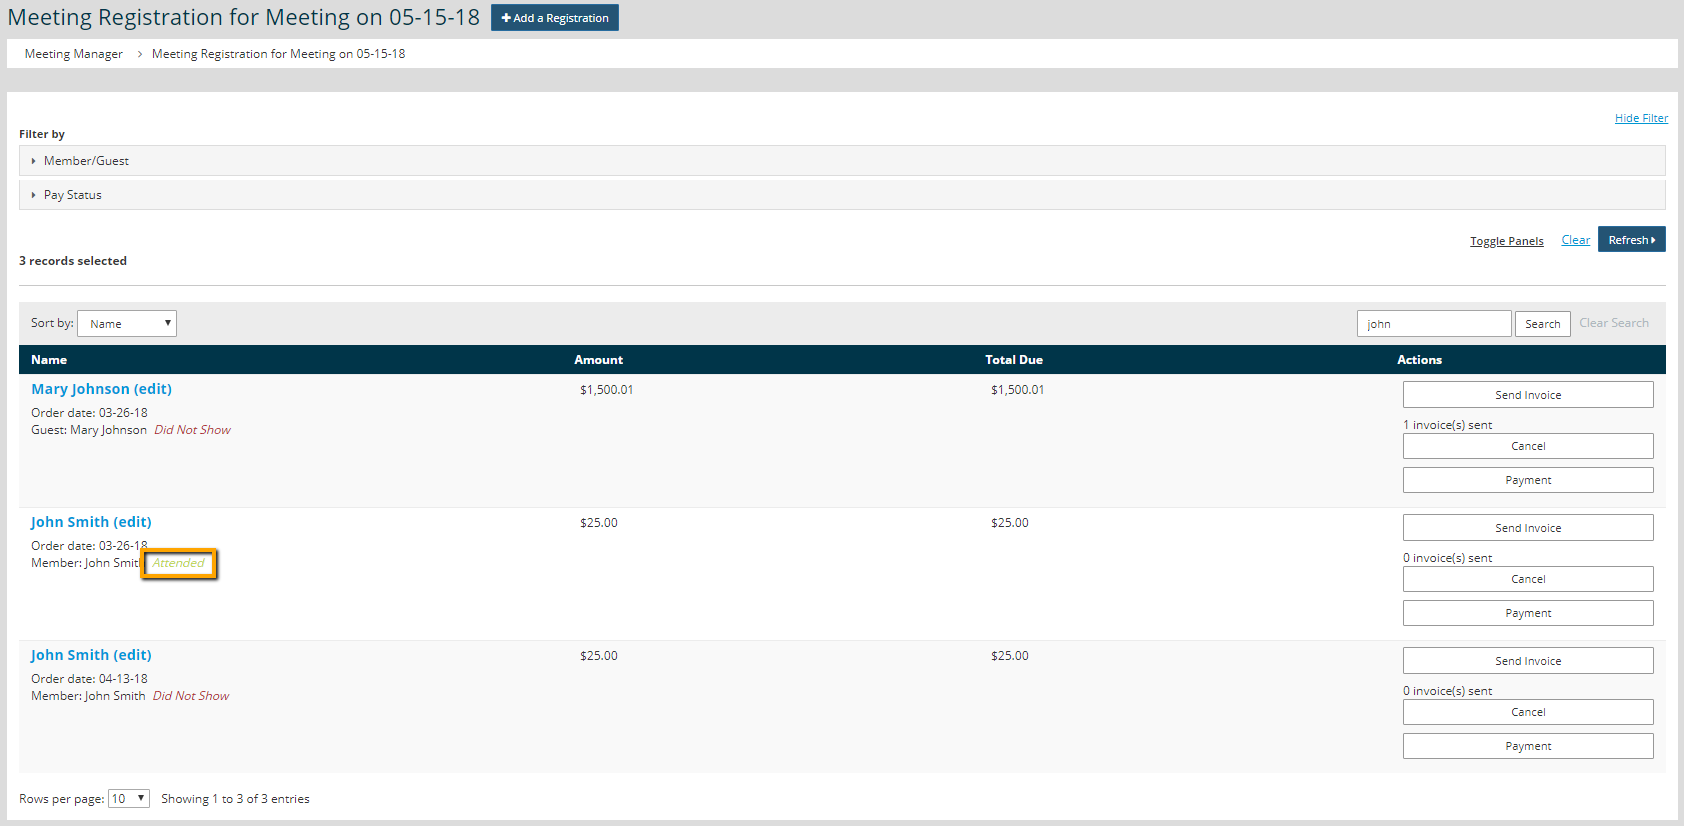
Tip: To configuration StarChapter to mark all registrants as "Did Not Show" by default, go to Meetings > Settings > Permission and enable "Default registrations to 'No-Show'?"
- If there is a balance on the order, click Payment.
- Follow the payment wizard to enter the payment. A receipt will be generated automatically.
- Provide the registrant with their badge, if applicable.