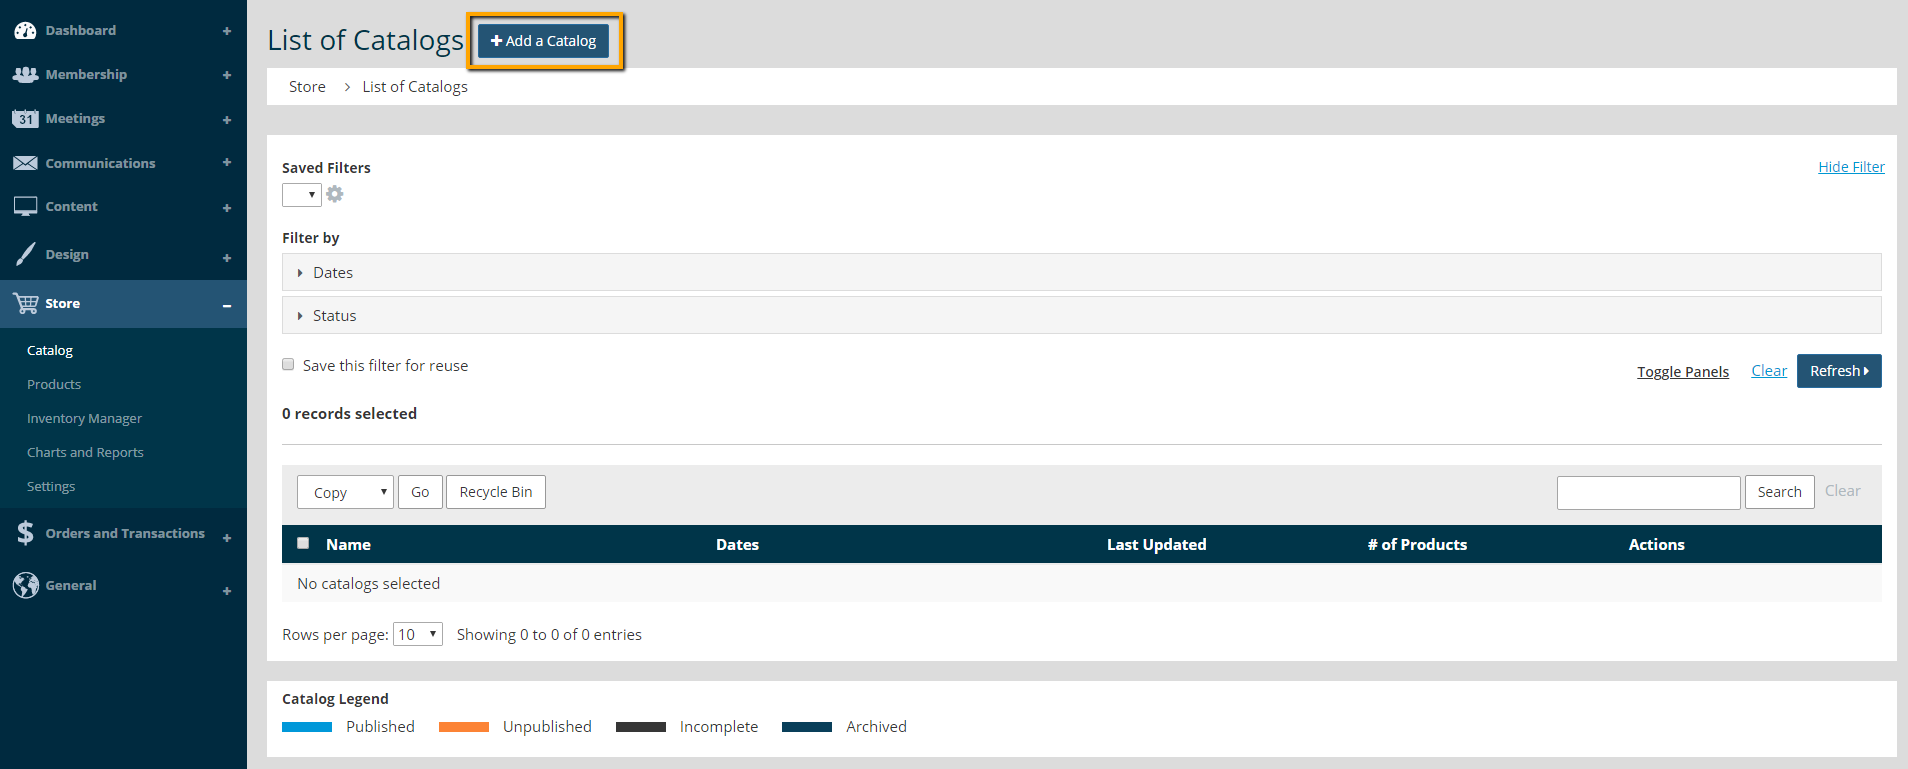
Create a Catalog
- Go to Store > Catalog.
- Click Add a Catalog.
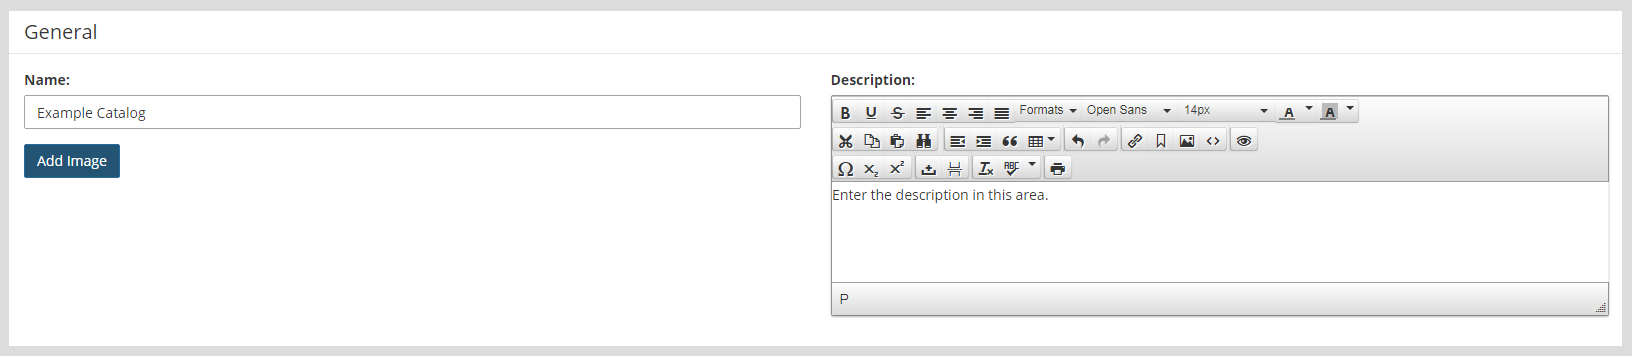
- Enter the Name of the new catalog. Catalogs can have an associated Image and a Description (both are optional).
- Enter a Fixed Transaction Cost, if applicable.

Tip: Fixed, per transaction costs are used for things like processing fees. Note Fixed Transaction Costs must be a fixed dollar amount. If this option is checked, boxes will appear to enter the amount of the cost and a description of the charge. This description is standard and used for all fixed tranaction fees.

- Enter a Publish Date and Expiration Date (optional). Catalogs will automatically become available on the built-in catalog listing page, and will be available to add to pages on the publish date. They will disappear from these same areas on the expiration date.

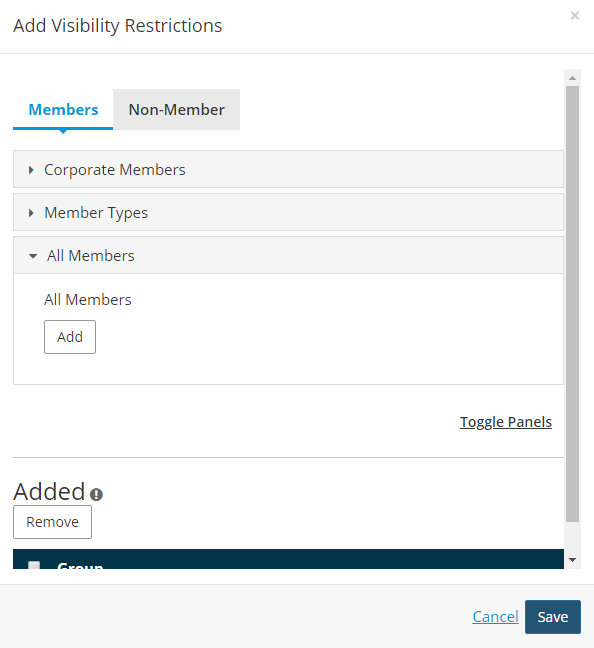
- Set restrictions, if applicable. Restrictions allow set users to access the catalog. Click the Restrictions button, choose a parent group, and click the Add button to choose who can access the catalog. Click Save once complete.
- Click Next.
- Select a product from the drop-down, or start typing the name of a product in the box. A list of matches will appear. Once you've selected a product, click the Add button to add the product to this catalog.
Tip: Products must be created in Store > Products before they are available to include in a Catalog.
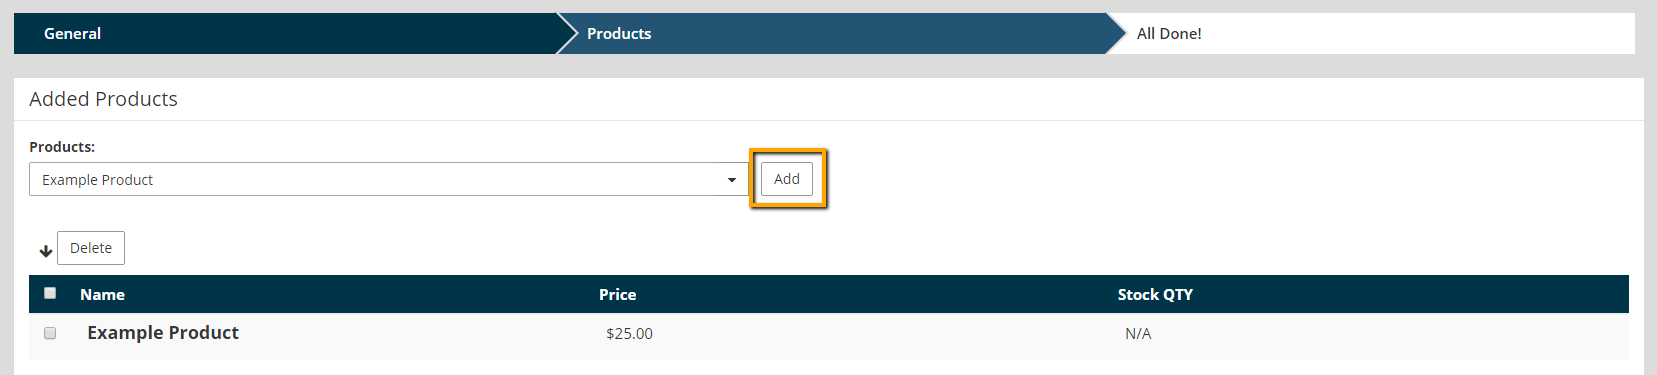
- Use the Sort Products button beneath the product listing to rearrange your products if needed.

- The last step is a summary screen with a recap of what has been done for this catalog. New catalogs are unpublished by default. If the catalog does not have a set publish date, click the Publish to make it accessible. The catalog may be unpublished at any time.