Set Page Restrictions
Setting page restrictions allows you to control who has the ability to view the content on a page. This can be helpful if you need to hide information from the public, and only allow members to access the page.
Add Page Restrictions:
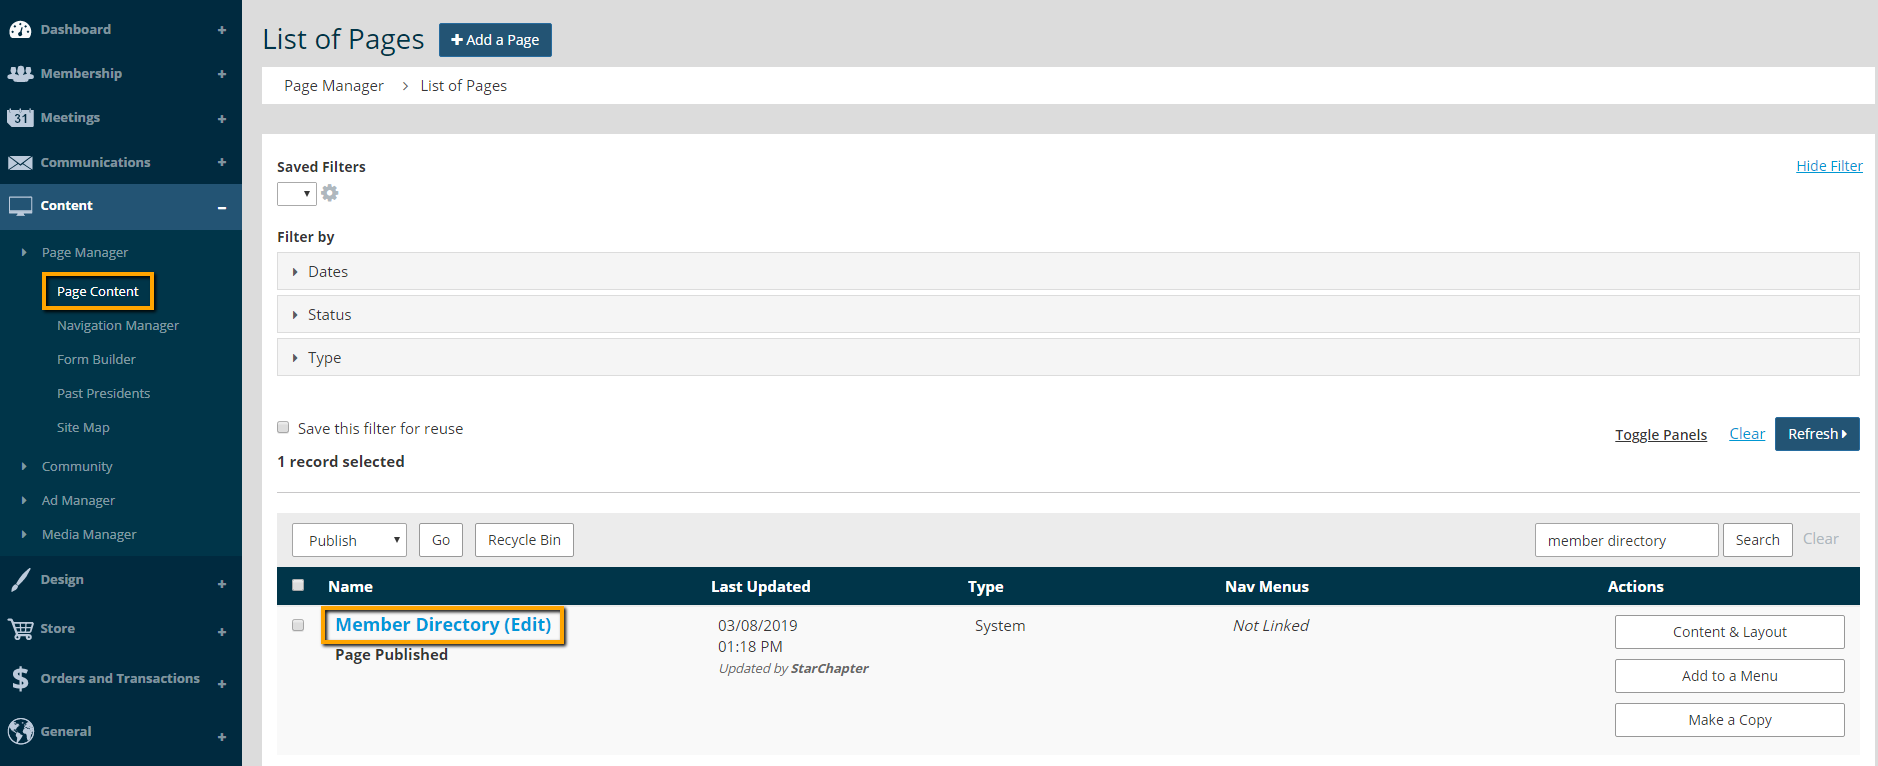
- Go to Content > Page Manager > Page Content.
- Search for your page and click on the page name to edit.
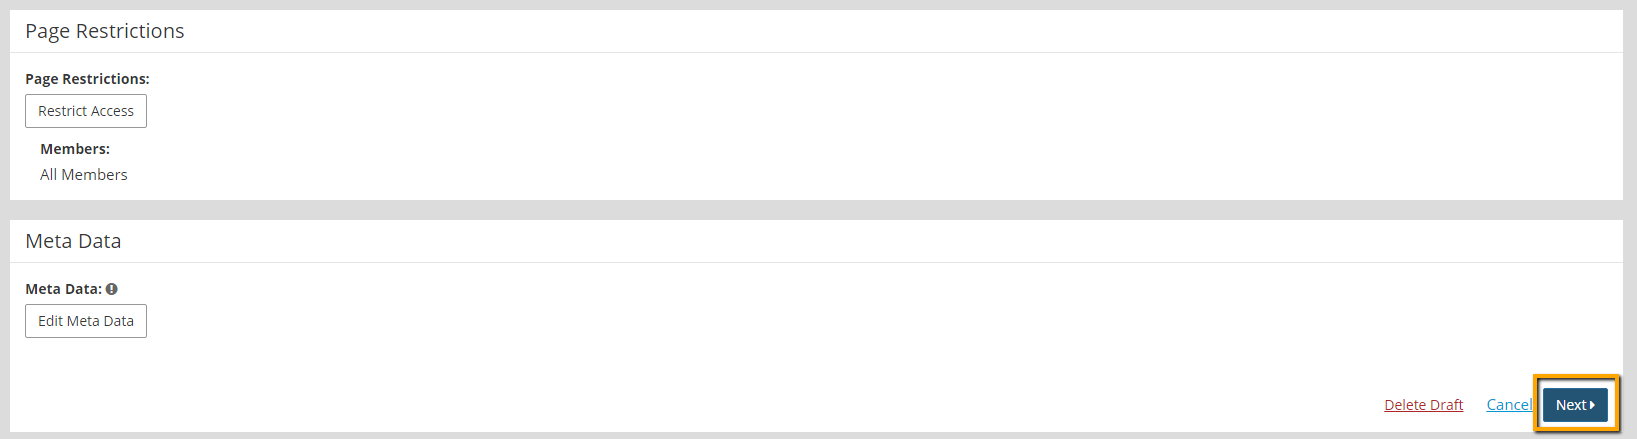
- Click Edit in the Restrictions section.
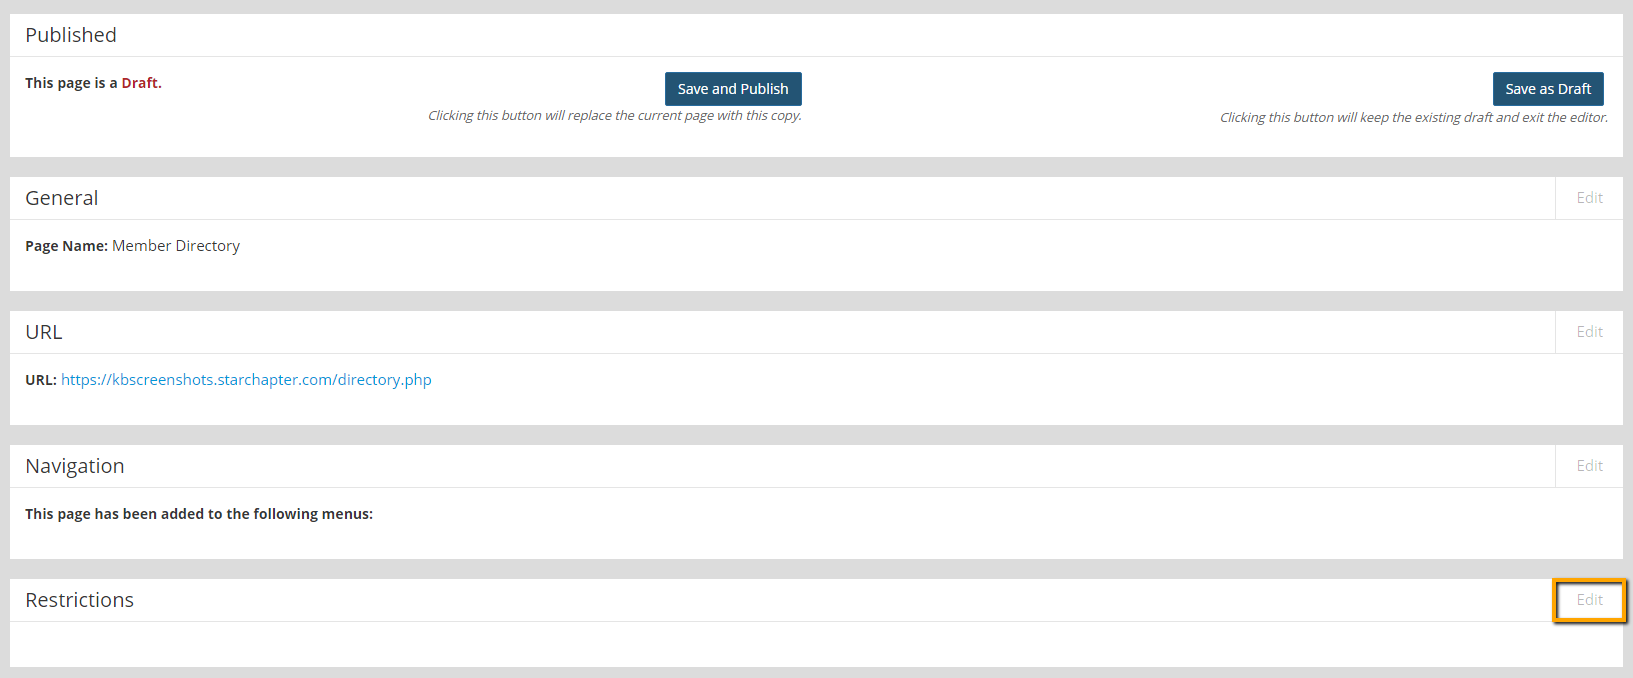
- Click the Restrict Access button.

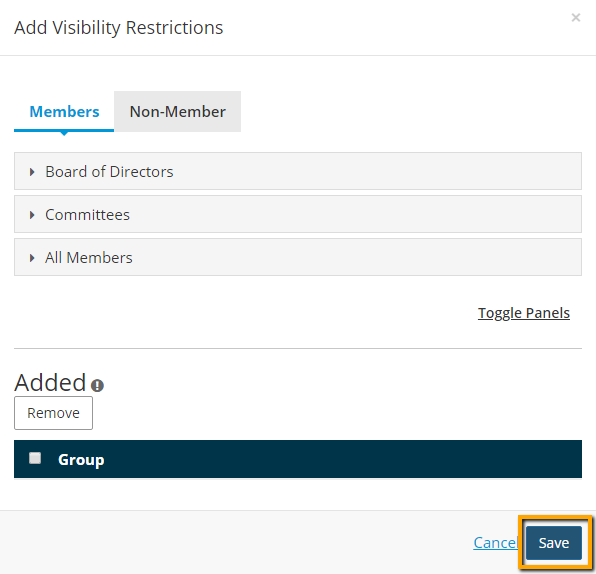
- Add visibility restrictions by adding the group(s) who should have access to the page. If only logged in members should have access to the page, click the drop down for All Members, and click Add.
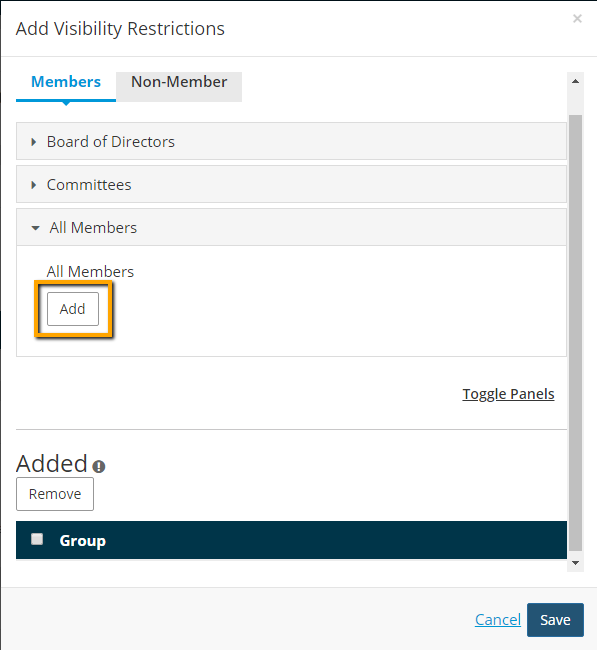

Tip: If your group of interest is not displayed in the Visibility Restrictions filter, go to Membership > Group Manager, and enable the Page Content function within that group.
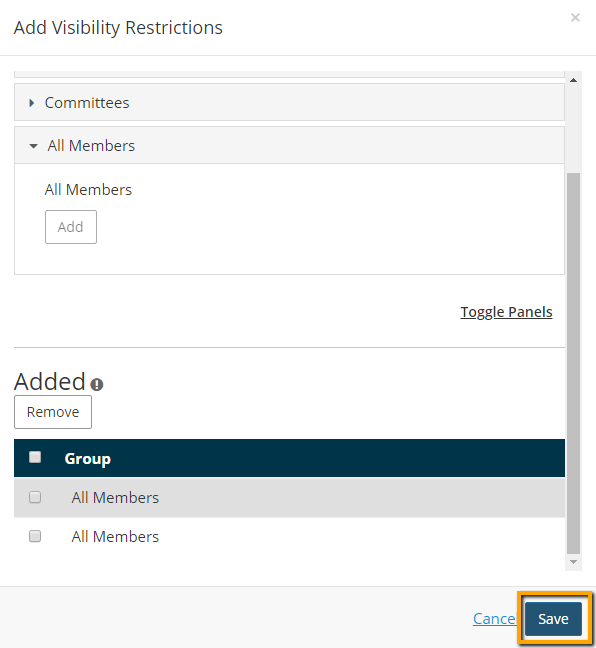
- Click Save.
- Click Next.
- Click the Save and Publish button.


Remove Page Restrictions:
Some system pages are restricted to members by default. You have the ability to remove visability restrictions and allow the public to have access to a page.
- Go to Content > Page Manager > Page Content.
- Search for your page and click on the page name to edit.
- Click Edit in the Restrictions section.

- Click the Restrict Access button.

- Check the box next to the group that needs to be removed, and click the Remove button.
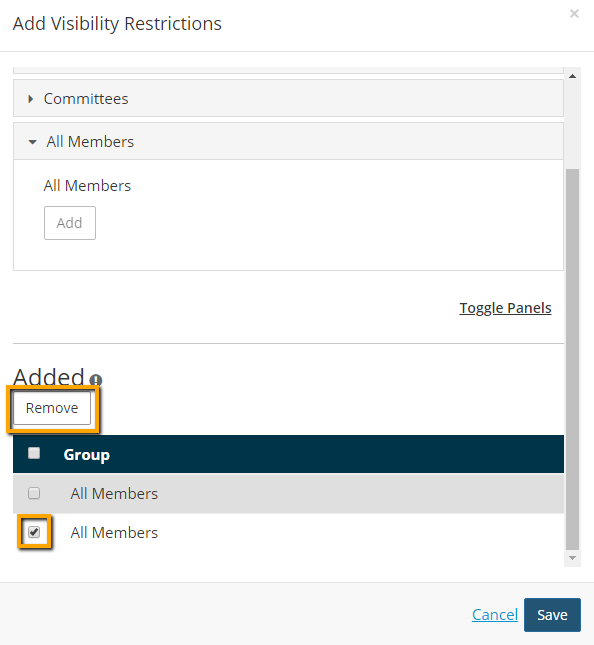
- Click Save.
- Click Next.
- Click the Save and Publish button.